Saturday, March 26, 2011

Coconut Chocolate Chip Cookies

I was hungry for some cookies last night so I threw these together.  I used milk chocolate chips because I had some that I needed to use up, but I'm sure these cookies would also be delicious with semi-sweet chocolate as well.  If you want to give them even more of an Almond Joy candy bar feel, you can throw in some chopped almonds.
COCONUT CHOCOLATE CHIP COOKIES
From Hannah's Kitchen

INGREDIENTS
1 cup shortening
3/4 cup brown sugar
3/4 cup white sugar
1 teaspoon vanilla
2 eggs
2 1/2 cups all-purpose flour
1 teaspoon baking soda
1 teaspoon salt
2 cups milk chocolate chips
1 cup shredded sweetened coconut

DIRECTIONS
1. Preheat oven to 350 degrees. Line cookie sheets with parchment paper.

2. In a large bowl, cream shortening and sugars until light and fluffy.  Add in eggs and vanilla and mix until combined.  In a small bowl, stir together flour, baking soda, and salt.  Slowly add flour mixture to the sugar mixture, mixing just until combined.  Stir in chocolate chips and coconut.

3. Drop dough by the tablespoon onto cookie sheets and bake 8-10 minutes, or until edges begin to turn light brown.  Cool on cookie sheets for 5 minutes, then remove to wire racks to cool completely.

Friday, March 18, 2011

Strawberry Cake with Cream Cheese Frosting

Today we had a baby shower at work for one of our co-workers who is about to become a father for the second time.  The papa-to-be said he likes strawberry cake, so this was the perfect opportunity for me to make a strawberry cake for the first time.  As you can see, strawberry cake is quite pink.  However, the new baby is going to be a boy so I decorated the cake with blue accents to match all the other lovely decor that the shower masterminds had put together.  Even though the blue and pink look a little strange together on a cake, the various colors did not affect the taste.  Most strawberry cakes are flavored with Jello, but this one gets all of its flavor from real strawberries.  It was pretty good and you could definitely taste the strawberry flavor.  The frosting recipe makes a little more than you really need, but I'm not complaining.  And once again, a big congratulations to Mr. and Mrs. M!
I used thawed frozen strawberries...
 ...and blended them into a puree.
The dry ingredients are mixed together.
Then the strawberries and butter are added to make a very thick batter.
After the other liquid ingredients are added the batter is poured into pans.
The finished cake is tall!
Grab a fork.
STRAWBERRY CAKE WITH CREAM CHEESE FROSTING
From Smitten Kitchen, adapted from Sky High

INGREDIENTS - CAKE
4 1/2 cups cake flour
3 cups sugar
5 1/4 teaspoons baking powder
3/4 teaspoon salt
3 sticks (12 ounces) unsalted butter, at room temperature
1 1/2 cups pureed frozen strawberries*
8 egg whites
2/3 cup milk
1 to 2 drops red food dye, if using (to make the pink color pop more)

INGREDIENTS - FROSTING
3 (8 ounce) packages cream cheese, softened
3 sticks (12 ounces) unsalted butter, softened
8 cups sifted confectioners’ sugar
2 teaspoons vanilla extract
Dash of salt

DIRECTIONS
1. Preheat the oven to 350. Butter three 9-inch round or 8-inch square cake pans. Line with parchment or waxed paper and butter the paper.

2. Put the flour, sugar, baking powder, and salt in a large mixer bowl. With the electric mixer on low speed, blend for 30 seconds. Add the butter and strawberry puree and mix to blend the ingredients. Raise the speed to medium and beat until light and fluffy, 2 to 3 minutes; the batter will resemble strawberry ice cream at this point.

3. In another large bowl, whisk together the egg whites, milk and red food dye, if using, to blend. Add the whites to the batter in two or three additions, scraping down the sides of the bowl well and mixing only to incorporate after each addition. Divide the batter among the three prepared pans.

4. Bake the cakes for 30 to 34 minutes, or until a cake tester or wooden toothpick inserted into the center comes out clean. Allow the layers to cool in the pans for 10 to 15 minutes. Invert and turn out onto wire racks and peel off the paper liners. Let stand until completely cooled before assembling the cake, at least an hour.

5. For the frosting, in a medium bowl, cream together the cream cheese and butter until creamy. Mix in the vanilla and salt, then gradually stir in the confectioners’ sugar. Store in the refrigerator after use.

6. To assemble the cake, place one cake layer on a cake board or platter. Tucking scraps of waxed paper under the edges of the cake will protect the board or plate from any mess created while frosting the cake. Spread about 1 cup frosting over the layer, spreading it to the edge. Repeat with the second layer. Add the top layer and frost the top and sides of cake with remaining frosting, reserving a small amount if you wish to tint it and pipe a decoration on the cake. If not, you can decorate the cake top with thinly-sliced strawberries. Remove the waxed strips to reveal and neat, clean cake board.

* Sky High notes that it may seem surprising that frozen strawberries are used here, but they’re always available and their quality is consistent.  Also, you need to use 1 1/2 cups of the puree, NOT 1 1/2 cups strawberries.  I used an entire 16 ounce bag of thawed frozen strawberries and had just over 1 1/2 cups of puree.

Thursday, March 10, 2011

Smores Cookies

I have a really good Smores bar cookie recipe, but I have been searching for a Smores cookie recipe for a few weeks.  Sometimes bars will not do and you just need individual cookies!  The key to keeping these cookies looking nice is to put the marshmallows and milk chocolate pieces on after the cookies are mostly done, and then pop them back into the oven to finish baking.

SMORES COOKIES
From Hannah's Kitchen

INGREDIENTS
1/2 cup butter
1/2 cup shortening
1 cup packed light brown sugar
1/2 cup granulated sugar
2 eggs
1 teaspoon vanilla
2 1/2 cups all-purpose flour
1/2 teaspoon baking soda
1/4 teaspoon salt
3/4 cup mini semi-sweet chocolate chips
1 cup crumbled graham crackers (leave some small chunks)
2 cups mini marshmallows
2 large Hershey's Milk Chocolate candy bars, chopped

DIRECTIONS
1. Preheat oven to 375 degrees F. Line a cookie sheet with parchment paper.

2. In a small bowl, combine flour, baking soda, and salt.

3. In a large bowl, beat butter, shortening, brown sugar and granulated sugar until light and fluffy. Beat in eggs and vanilla until combined. Add in flour mixture until just combined. Stir in graham crackers and mini chocolate chips.

4. Drop dough with a small cookie scoop (about one tablespoon in size) about 2-inches apart on the prepared cookie sheets. Bake for 6-7 minutes or until cookies are just starting to set. Remove cookies from oven and top with marshmallows and Hershey's candy bar pieces. Return cookies to the oven for 1 1/2 to 2 minutes or until cookies have finished baking and the edges are light golden brown.

5. Remove cookies to wire racks to cool.

Sunday, March 6, 2011

Black and White Chocolate Cake

Happy Birthday to Matthew!  My husband's birthday was this past weekend and he always likes to have a unique and somewhat fancy cake to celebrate.  This year he chose the black and white chocolate cake from Baking: From My Home to Yours by Dorie Greenspan.  The cake and its wonderful creams were challenging, but definitely worth the effort.  I will admit, it took me two tries to get the white chocolate whipped cream to work.  It curdled badly the first time, so the second time I was much more careful and did not crank the mixer to high power (which is what the recipe indicates).  My second effort was a success.  I had never eaten white chocolate whipped cream before and was surprised to find out how rich and delicious it tasted.  The recipe suggested topping the cake with chocolate curls, but by the time I was finally finished assembling all the layers I was exhausted and settled for a sprinkling of cocoa powder.
BLACK AND WHITE CHOCOLATE CAKE
From Baking: From My Home to Yours by Dorie Greenspan

INGREDIENTS
For the Cake:
2 cups cake flour
2 t baking powder
1/8 t baking soda
1/4 t salt
1 1/4 sticks (10 T) unsalted butter, room temp.
1 cup sugar
3 large eggs
1 large egg yolk
1 t pure vanilla extract (I'm going to substitute vanilla beans from my huge stash!)
3/4 cup buttermilk

For the Dark Chocolate Cream:
2 cups whole milk
4 large egg yolks
6 T sugar
3 T cornstarch, sifted
1/4 t salt
7 oz bittersweet chocolate, melted
2 1/2 T unsalted butter, cut into 5 pieces, at room temp

For the White Chocolate Whipped Cream:
6 oz premium quality white chocolate (such as Valrhona Ivoire or Guittard), finely chopped
1 1/2 cups heavy cream

Chocolate shavings or curls for decoration (optional)

DIRECTIONS
Getting Ready: Center a rack in the oven and preheat the oven to 350degrees F. Butter two 9 x 2 inch round cake pans, dust insides with flour, tap out the excess and line the bottoms of the pans with parchment or wax paper. Put the pans on a baking sheet.

To Make the Cake: Sift together the cake flour, baking powder, baking soda and salt.

Working with a stand mixer, preferably fitted with a paddle attachment, or with a hand mixer in a large bowl, beat the butter on medium speed until soft and creamy. Add the sugar and beat for another 3 minutes. Add the eggs one by one, and then the yolk, beating for 1 minute after each addition. Beat in the vanilla; don't be concerned if the mixture looks curdled. Reduce the mixer speed to low and add the dry ingredients alternately with the buttermilk, adding the dry ingredients in 3 additions and the milk in 2 (begin and end with the dry ingredients); scrape down the sides of the bowl as needed and mix only until the ingredients disappear into the batter. Divide the batter evenly between the two pans and smooth the tops with a rubber spatula.

Bake for 28 to 30 minutes, rotating the pans at the midway point. When fully baked, the cakes will be golden and springy to the touch and a thin knife inserted into the centers will come out clean. Transfer the cakes to a rack and cool for about 5 minutes, then unmold, remove the paper and invert to cool to room temperature right side up on the rack.

To Make the Dark Chocolate Cream:
Bring the milk to a boil.

Meanwhile, in a large heavy-bottomed saucepan, whisk the egg yolks with the sugar, cornstarch and salt until thick and well blended. Whisking without stopping, drizzle in about 1/4 cup of the hot milk--this will temper, or warm, the yolks so they won't curdle--then, still whisking, add the remainder of the milk in a steady stream. Put the pan over medium heat and, whisking vigorously, constantly and thoroughly (make sure to get into the edges of the pan), bring the mixture to a boil. Keep at a boil, still whisking, for 1 to 2 minutes. Remove the pan from the heat.

Whisk in the melted chocolate, and let stand for 5 minutes. Then whisk in the pieces of butter, stirring until they are fully incorporated and the chocolate cream is smooth and silky. Press a piece of plastic wrap against the surface of the cream to create an airtight seal and refrigerate the cream until chilled, or for up to 3 days. Or, if you want to cool the cream quickly, put the bowl with the cream into a larger bowl filled with ice cubes and cold water and stir the cream occasionally until it is thoroughly chilled, about 20 minutes.

To Make the White Chocolate Whipped Cream:
Put the white chocolate in a heatproof bowl and put the bowl over a saucepan of gently simmering water. Stir frequently to melt the chocolate evenly. Meanwhile, bring 1/2 cup of the heavy cream to a boil.

When the white chocolate is melted, remove the bowl from the pan. Pour the hot cream into the melted chocolate and let it sit for a minute. Using a small spatula, stir the chocolate gently until it is smooth. Let it sit on the counter until it reaches room temperature--it can't be the least bit warm when you add it to the whipped cream.

Working with the stand mixer with the whisk attachment or with a hand mixer in a large bowl, beat the remaining 1 cup heavy cream only until it holds the softest peaks. Turn the machine to high, add the cooled white chocolate all at once and continue to beat until the whipped cream holds firm peaks. Turn the whipped cream into a bowl, press a piece of plastic wrap gently against the surface to create an airtight seal and refrigerate for at least 2 hours, or up to 6 hours.

To Assemble the Cake:
If the tops of the cake layers have crowned, use a long serrated knife and a gentle sawing motion to even them. Slice each layer horizontally in half. Place one layer cut side down on a cardboard cake round or on a cake plate protected by strips of wax or parchment paper.

Remove the dark and white chocolate creams from the refrigerator and whisk each of them vigorously to loosen and smooth them. With a long metal icing spatula, spread enough dark chocolate cream (about 1 cup) over the cake layer to cover it completely. Top the cream with another cake layer, cut side up, and cover this layer with white chocolate whipped cream, making the white layer about the same thickness as the dark layer. Cover with a third layer, cut side up, and cover with another cup of so of the dark chocolate cream. (You'll have some dark chocolate cream left over--use it as a dip for madeleines or sables). Top with the final layer of cake, cut side down, and frost the sides and top with the remaining white chocolate whipped cream. If you'd like to decorate the top with chocolate shavings or curls, do it now.

Refrigerate for at least 3 hours, or overnight.

Thursday, February 24, 2011

Banana Walnut Chocolate Chip Cookies

This recipe was recommended to me by another baking enthusiast and the cookies turned out beautifully.  They are reminiscent of banana bread, but in a nice bite-sized package.  I altered the original recipe slightly because I did not have any whole wheat flour on hand.  I also used chocolate chips instead of chunks for the same reason.  The oats, chocolate chips, and walnuts make these cookies special and they are definitely worth a try!

BANANA WALNUT CHOCOLATE CHIP COOKIES
Adapted from Martha Stewart

INGREDIENTS
1 1/2 cups all purpose flour
1 teaspoon coarse salt
1/2 teaspoon baking soda
3/4 cup unsalted butter, softened
1/2 cup granulated sugar
1/2 cup packed light brown sugar
1 large egg
1 1/2 teaspoons pure vanilla extract
1/2 cup mashed ripe banana (about 1 large)
1 cup old-fashioned oats
8 ounces semi-sweet chocolate chips
1/2 cup coarsely chopped walnuts, toasted

DIRECTIONS
1. Preheat oven to 375 degrees. Line cookie sheets with parchment paper.

2. Whisk together flour, salt, and baking soda in a small bowl. Put butter and sugars into the bowl of an electric mixer fitted with the paddle attachment; mix on medium speed until pale and fluffy. Reduce speed to low and add egg and vanilla; mix until combined. Add flour mixture and mix until just combined. Stir in oats, chocolate chips, and walnuts.

3. Using a 1 1/2 inch ice cream or cookie scoop, drop dough onto baking sheets about 2 inches apart. Bake cookies until golden brown and set, 10-12 minutes. Let cookies cool on sheets for 5 minutes and then transfer cookies to wire racks to cool completely.

Friday, February 4, 2011

Chocolate Cupcakes with Chocolate Cream Cheese Frosting

The weather in Dallas has been crazy the past few days, which has prompted me to do some baking to keep busy.  We had an ice storm at the beginning of the week followed by 5 inches of snow last night!  I actually baked these cupcakes for a coworker's birthday today, but she wasn't able to make it into the office and then the office closed about an hour after I had arrived.  Somehow, those of us who made it into the office managed to eat a dozen cupcakes between 8:15 and 9:00 a.m., but I still have another dozen to eat over the weekend.  I'll probably have to come up with something else to bring for the birthday girl on Monday!  These cupcakes were super moist and the frosting was divine.  Don't skimp on the coffee - you will not taste it in the baked cupcakes and it really does enhance the chocolate flavor.  I especially liked how the cupcake ingredients are all just dumped into a bowl and mixed together, making these super quick to whip up.
CHOCOLATE CUPCAKES WITH CHOCOLATE CREAM CHEESE FROSTING
Adapted from Paula Deen

YIELD - 24 CUPCAKES

INGREDIENTS - CUPCAKES
8 ounces sour cream
1 tablespoon vanilla extract
2 cups all-purpose flour
2 1/4 cups sugar
3/4 cup unsweetened cocoa powder
1/2 teaspoon baking powder
1 1/2 teaspoons baking soda
1/2 teaspoon salt
1 cup strong brewed coffee
1 cup vegetable oil
3 large eggs

INGREDIENTS - FROSTING
8 ounces cream cheese, softened
8 ounces butter, softened
1/2 cup unsweetened cocoa powder
1 teaspoon vanilla extract
4 cups powdered sugar

DIRECTIONS:
1. Preheat oven to 350 degrees F. Line cupcake pans with 24 cupcake liners.

2. For the cupcakes - in a large bowl, combine all the cupcake ingredients. Beat at medium speed with an electric mixer until smooth. Divide batter among the 24 cupcake liners. Bake for 16 to 18 minutes or until a toothpick inserted in the center comes out clean. Let cool in pans for 10 minutes. Remove cupcakes from pans and let cool completely on wire racks.

3. For the frosting - place the cream cheese and butter in a large mixing bowl and beat on medium speed until combined, about 30 seconds.  Add the cocoa powder and vanilla and mix until combined.  Add the powdered sugar one cup at a time, mixing after each cup is added.  Once ingredients are combined, beat on medium speed for 2 minutes until frosting is light and fluffy. Pipe or spread frosting onto cooled cupcakes.

Tuesday, January 18, 2011

Fudgy Kahlua Brownies

This past weekend I volunteered to bring dessert to a ladies-only potluck hosted by a fellow food-loving friend.  I figured some brownies with booze would go over well with a crowd of 10-12 ladies free from husbands and children for the evening.  We put out a pretty impressive dinner spread and it was a great evening.  I prefer my brownies to be fudgy, and these ones did not disappoint.  They turned out thick and rich and had excellent flavor.  I originally made the icing with 2 tablespoons of Kahlua, but it seemed a bit boozy, so the icing recipe below contains only 1 tablespoon.
FUDGY KAHLUA BROWNIES
Adapted from www.recipegirl.com

INGREDIENTS - BROWNIE
2 1/2 cups all-purpose flour
1/2 tsp baking powder
1 tsp salt
1 cup unsalted butter
2 cups semi-sweet chocolate chips
1 1/2 cups light brown sugar
2 large eggs
1/2 cup Kahlua (or another coffee liqueur)

INGREDIENTS - ICING
3 tbsp cocoa powder
3 tbsp unsalted butter, softened
1 tbsp Kahlua
1 2/3 cups powdered sugar
2-3 tbsp milk

DIRECTIONS
1. Preheat oven to 350 degrees F. Line a 9 x 9 inch pan with foil and spray with nonstick cooking spray.

2. For the brownies:  In a medium bowl, whisk together flour, baking powder, and salt; set aside.

3. Place chocolate chips and butter in a microwave safe bowl.  Microwave for 1 minute, then stir.  Continue to microwave in 15-20 second intervals, stirring after each interval, until chips are melted and combined with the butter.  Set aside to cool a bit.

4. In a large bowl with an electric mixer, beat sugar, eggs, and 1/2 cup Kahlua until combined. Pour in chocolate mixture and beat until well mixed.  Add in dry ingredients and beat just until combined.

5. Pour batter into prepared pan.  Bake for 40-45 minutes or until top cracks slightly and toothpick inserted in center comes out mostly clean (it is okay if the bottom of the toothpick is a little gooey).  Remove brownies from oven and let them cool completely before icing.

6. For the icing: In a medium bowl with an electric mixer, beat cocoa powder, butter, and Kahlua together until combined.  Incorporate powdered sugar, adding milk as necessary to reach a smooth, spreadable consistency.

7. Spread icing over the brownies after brownies have cooled.  Chill brownies in refrigerator for at least an hour before slicing.

Thursday, January 13, 2011

Peanut Butter Cup Cookies

If you like peanut butter cups then you will definitely love these cookies.  The dough is baked in mini muffin tins, and then while the dough is still warn a miniature peanut butter cup is pressed into the center.  I've also discovered that the chocolate on the top of the peanut butter cup melts, so it is really easy to throw on some festive winter (or other) decorations if you so desire.

PEANUT BUTTER CUP COOKIES

INGREDIENTS
1 3/4 cups all-purpose flour
1/2 teaspoon salt
1 teaspoon baking soda
1/2 cup butter, softened
1/2 cup white sugar
1/2 cup peanut butter
1/2 cup brown sugar
1 egg, lightly beaten
1 teaspoon vanilla extract
2 tablespoons milk
40 miniature chocolate covered peanut butter cups (such as Reeces), unwrapped

DIRECTIONS
1. Preheat oven to 375 degrees F.

2. Sift together flour, salt, and baking soda; set aside.

3. Cream together the butter, sugar, peanut butter, and brown sugar until fluffy. Beat in the egg, vanilla, and milk. Add the flour mixture and mix just until combined.

4. Shape into approximately 40 balls and place one ball in each well of a mini muffin pan.  You may have to do this in more than one batch if you don't have enough pans.

5. Bake for about 8 minutes. Remove from oven and immediately press a miniature peanut butter cup into the center of each mound of dough.  Cool and carefully remove from pan.

Friday, December 31, 2010

Chocolate Crinkle Cookies

These cookies are in all of my baking cookbooks and appear to be somewhat of a classic, but for some unknown reason I have never made them before.  The dough is more like a brownie batter, but it firms up enough to make cookie dough balls once it is refrigerated.  Do not skip the refrigeration step or you may end up with a big mess.  The finished cookie has a nice chewy, brownie-like texture and looks great as well.
CHOCOLATE CRINKLE COOKIES
Adapted slightly from King Arthur Flour

INGREDIENTS
1 1/3 cups (8 ounces) chopped bittersweet chocolate
1/2 cup (4 ounces) unsalted butter
2/3 cup (4 3/4 ounces) sugar
3 large eggs
2 teaspoons vanilla
1 teaspoon espresso powder (optional)
1/2 teaspoon baking powder
1/4 teaspoon salt
1 2/3 cups (7 ounces) all-purpose flour
1 cup (or more) confectioners' sugar (for coating)

DIRECTIONS
1. Place the chocolate and butter in a small saucepan or microwave-safe bowl, and heat or microwave until the butter melts.  Remove from heat and stir until the chocolate melts and the mixture is smooth.

2. In a separate bowl, beat together the sugar, eggs, vanilla and espresso powder. Stir in the chocolate mixture, baking powder and salt, then the flour just until incorporated.

3. Chill the dough for 2-3 hours or overnight.  The dough will firm up considerably.

4. Preheat oven to 325 degrees.

5. Put about a cup of confectioners' sugar into a shallow bowl.  Scoop out heaping teaspoon-sized portions of dough and roll into balls (about 1 1/4 inch in diameter). Drop the dough balls in the confectioners' sugar as you go, coating about 5 or 6 balls at a time.

6. Place the coated dough balls on a parchment lined cookie sheet, leaving about 1 1/2 inches between the balls. Bake for 10-12 minutes, or until the edges are set.  Cool on a wire rack.

Sunday, December 26, 2010

Seven Layer Bars

There are seven layers of deliciousness in these bars, which makes for a super rich and decadent treat.  I generally cut them into fairly small squares because they are so sinful!  These were a lovely (and popular) addition to my holiday cookie tins this year.
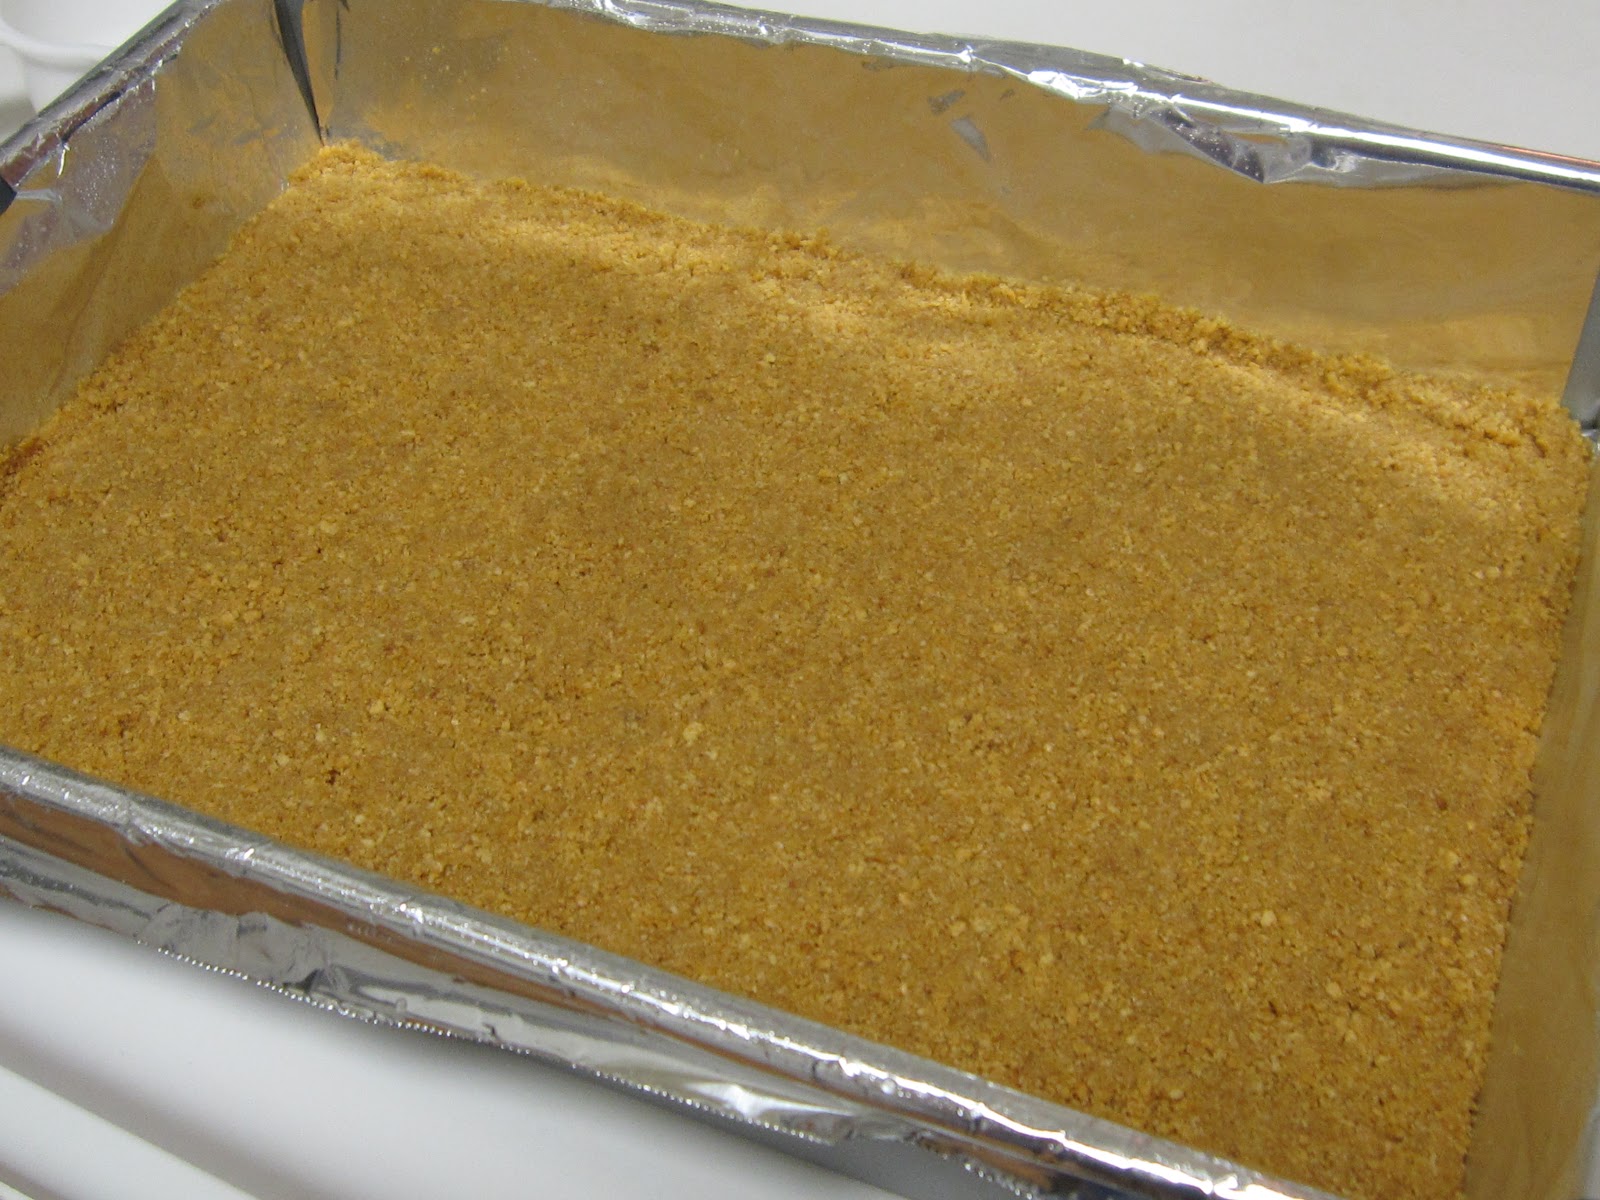
 Let's review the seven layers.  Layer 1: graham cracker crumb crust.
Layer 2:  semi-sweet chocolate chips.
Layer 3:  butterscotch chips
Layer 4:  white chips.
Layer 5:  walnuts.
Layer 6:  sweetened condensed milk.
Layer 7: shredded coconut.
Simple and delicious!
SEVEN LAYER BARS

INGREDIENTS
1/2 cup unsalted butter, melted
1 1/2 cups graham cracker crumbs
1 cup semi-sweet chocolate chips
1/2 cup butterscotch chips
1/2 cup white chips
1 cup chopped walnuts
1 (14 ounce) can sweetened condensed milk
1 1/3 cups shredded coconut

DIRECTIONS
1. Preheat oven to 350 degrees F.  Coat a 13 x 9 inch pan with cooking spray or line pan with foil.

2. In a small bowl, mix graham cracker crumbs and melted butter until crumbs are moistened.  Press crumb mixture into bottom of prepared pan.

3. Layer chocolate chips, butterscotch chips, white chips, and walnuts over crumbs. Pour condensed milk over the chips and nuts.  Sprinkle coconut over the condensed milk.

4. Bake until edges are golden brown, about 25 minutes.  Cool completely before cutting.

Friday, December 24, 2010

Scotcheroos

These bars remind me of high school cross country (which was looong ago, I might add).  Every week before our meet, the team would have a spaghetti dinner and there were always scotcheroos for dessert.  I ate lots and lots of these bars in high school, and they continue to remain a favorite of mine.  These are not fancy, but the combination of crunchy cereal, smooth peanut butter, and the creamy chocolate topping is addicting!
SCOTCHEROOS
From Nestle Classic Recipes

INGREDIENTS
1 1/2 cups creamy peanut butter
1 cup granulated sugar
1 cup light corn syrup
6 cups toasted rice cereal
1 2/3 cups (11 ounces) butterscotch chips
1 cup (6 ounces) semi-sweet chocolate chips

DIRECTIONS
1. Coat a 13 x 9 inch baking pan with cooking spray.

2. Combine sugar and corn syrup in large saucepan.  Cook over medium-low heat, stirring frequently, until melted.  Add peanut butter and stir until peanut butter is melted and combined with the sugar mixture. Remove from heat.  Add cereal; stir until thoroughly coated. Press into bottom of prepared baking pan.

3. Microwave butterscotch chips and chocolate chips in large microwave-safe bowl for 1 minute; stir. Microwave at additional 10- to 20-second intervals, stirring until smooth. Spread over cereal mixture.

4. Refrigerate for 15 to 20 minutes or until topping is firm. Cut into bars.

Sunday, December 12, 2010

Chocolate Chip Pecan Pie

I am not sure if I have ever actually made a pecan pie before.  However, since I now live in the South, I feel like I should have a go-to pecan pie recipe (or chocolate chip pecan pie recipe).  I made this pie for a co-worker's last day at the office.  He is a native Texan, and of course he loves pecan pie.  This recipe turned out great, and my co-workers gave it a big thumbs up.  If you are feeling daring, you can add a tablespoon or two of bourbon to the filling mixture.

CHOCOLATE CHIP PECAN PIE
From Hannah's Kitchen

INGREDIENTS
1 cup light corn syrup
1/2 cup granulated sugar
1/4 cup butter, melted
1 teaspoon vanilla extract
3 eggs
1 cup (6 ounces) semi-sweet chocolate chips
1 1/2 cups pecan halves
1 prepared pie shell

DIRECTIONS
1. Heat oven to 350 degrees.

2. In a bowl, beat together the corn syrup, sugar, butter, vanilla, and eggs.

3. In the bottom of the pie crust, neatly arrange pecans and sprinkle chocolate chips over the pecans. Slowly pour syrup mixture into the pie shell, on top of the pecans and chocolate chips.

4. Place pie on cookie sheet and bake for about 1 hour, checking after 45 minutes.

5. Pie is done when top is a deep golden brown and filling is set.  Cool completely before serving.

Friday, December 10, 2010

Tunnel of Fudge Cake

This cake rose to popularity after the recipe was entered into the Pillsbury Bake-off sometime in the 1960s.  Pillsbury discontinued the packaged frosting mix that was used in the original recipe, so bakers everywhere (or maybe not everywhere - I have nothing to back this claim up) set out to re-create this classic.  The first time I attempted to make this cake I was using a terrible quality bundt pan, the cake didn't come out of the pan, disaster ensued, and I ended up with tunnel of fudge cake balls.  Now I have a nice, high quality Nordicware anniversary bundt pan, and all is right with the world.  The cake turned out to be deliciously dense and rich.  The fudge center tasted almost like brownie batter.  Do not omit the nuts from this recipe, as they are important to achieving the proper consistency.
 This picture isn't great, but it does a nice job of showing off the fudgy center.
TUNNEL OF FUDGE CAKE
Adapted from The America's Test Kitchen Family Baking Book

INGREDIENTS - CAKE
1/2 cup boiling water
2 ounces bittersweet chocolate, chopped
2 cups all-purpose flour
2 cups walnuts, chopped fine
2 cups confectioners' sugar
3/4 cup Hershey's Special Dark cocoa powder or Dutch-processed cocoa powder
1 teaspoon salt
2 1/2 sticks unsalted butter, softened
1 cup granulated sugar
3/4 cup packed light brown sugar
1 tablespoon vanilla extract
5 large eggs, room temperature

INGREDIENTS - GLAZE
4 ounces bittersweet chocolate, melted
1/3 cup heavy cream, hot
2 tablespoons light corn syrup
1/4 teaspoon vanilla extract
pinch salt

DIRECTIONS
1. Adjust oven rack to the lower-middle position and heat the oven to 350 degrees.  Grease and flour a 12-cup bundt pan or spray pan liberally with bake release spray.

2. Whisk the boiling water and chopped chocolate together in a small bowl until melted and smooth.  Let the mixture cool slightly.  In a medium bowl, whisk the flour, nuts, confectioners' sugar, cocoa, and salt together.

3. In a large bowl, beat the butter, granulated sugar, brown sugar, and vanilla together with an electric mixer on medium speed until light and fluffy - about 3-6 minutes. Beat in the eggs, one at a time, until combined, about 1 minute. Beat i the chocolate mixture until combined, about 30 seconds. Reduce mixer speed to low and slowly beat in the flour mixture until just incorporated, about 30 seconds.

4. Scrape the batter into the prepared pan and smooth the top. Wipe any drops of batter off the sides and gently tap the pan on the counter to settle the batter. Bake the cake until the edges begin to pull away from the sides of the pan and the top feels springy when pressed with a finger, about 45 minutes.  Do not overbake.

5. Let the cake cool in the pan for 10 minutes, then flip it out onto a wire rack to cool. Let the cake cool completely, about 2 hours.

6. For the glaze, whisk all of the glaze ingredients together in a medium bowl until smooth. Let sit until thickened, about 25 minutes.

7. After the cake has cooled completely, drizzle the glaze over the top and sides of the cake.  Let the glaze set, about 25 minutes, before serving.

Sunday, November 21, 2010

Toll House Chocolate Chip Pie

If you are looking for a super easy and super tasty pie recipe, look no further.  I have been meaning to try this recipe for a while, and finally got my rear in gear and baked it this past week.  The pie tastes like a big gooey cookie, and would be wonderful served warm with a big scoop of vanilla ice cream.
TOLL HOUSE CHOCOLATE CHIP PIE
Adapted slightly from Nestle Toll House

INGREDIENTS
1 unbaked 9-inch (4 cup volume) deep dish pie shell
2 large eggs
1/2 cup all-purpose flour
1/2 cup granulated sugar
1/2 cup packed brown sugar
3/4 cup (1 1/2 sticks) butter, softened
1 cup (6 ounces) semi-sweet chocolate chips
1/2 cup chopped walnuts

DIRECTIONS
1. Preheat oven to 325 degrees F.

2. Beat eggs in large mixer bowl on high speed until foamy. Beat in flour, granulated sugar, and brown sugar. Beat in butter. Stir in chocolate chips and nuts. Spoon into pie shell.

3. Bake for 55 to 60 minutes or until knife inserted halfway between the outside edge and center comes out clean. Cool on wire rack. Serve warm.

Sunday, November 14, 2010

Lemon Pistachio Biscotti

I love biscotti!  This recipe makes a nice crunchy cookie with lots of big flavors.  If your pistachio nuts are salted, omit the salt called for in the recipe.  Enjoy!

LEMON PISTACHIO BISCOTTI
From Better Homes and Gardens Biggest Book of Cookies

YIELD - ABOUT 42 COOKIES

INGREDIENTS - COOKIES
1/3 cup butter, softened
2/3 cup sugar
2 teaspoons baking powder
1/2 teaspoon salt
2 eggs
1 teaspoon vanilla
2 cups all-purpose flour
4 teaspoons lemon zest
1 1/4 cups pistachio nuts

INGREDEINTS - LEMON ICING
1 cup sifted powdered sugar
1 teaspoon lemon zest
1-2 tablespoons lemon juice

DIRECTIONS
1. Grease a large cookie sheet and set aside.  Preheat oven to 375 degrees F.

2. In a large mixing bowl beat butter with an electric mixer on medium to high speed for 30 seconds. Add sugar, baking powder, and salt. Beat until combined, scraping sides of bowl occasionally. Beat in eggs and vanilla until combined. Beat in as much of the flour as you can with the mixer. Stir in any remaining flour and lemon zest with a wooden spoon. Stir in pistachio nuts.

3. Divide dough into three equal portions. Shape each portion into an 8-inch-long roll. Place rolls at least 3 inches apart on prepared cookie sheet and flatten to about 2 1/2 inches wide. Bake at 375 degrees F for 20 to 25 minutes or until golden brown and tops are cracked (loaves will spread slightly). Cool on cookie sheet for 1 hour.

4. Reduce oven temperature to 325 degrees F. Transfer rolls to a cutting board. Use a serrated knife to cut each roll diagonally into 1/2-inch slices. Place slices, cut side down, on an ungreased cookie sheet. Bake for 8 minutes. Turn slices over and bake for 8 to 10 minutes more or until dry and crisp (do not overbake). Transfer cookies to a wire rack and let cool.

5. For the lemon icing combine powdered sugar, lemon zest, and lemon juice to make an icing with a drizzling consistency.  Once cookies are cool, drizzle with icing.  Allow icing to dry before storing.

Sunday, October 31, 2010

Halloween Pumpkin Cakes

Happy Halloween!  These fun and festive little cakes are super cute and fairly easy to make.  I made mine using large chocolate cupcakes, but you could really use any flavor you like. 
HALLOWEEN PUMPKIN CAKES

DIRECTIONS
1. Depending on how big you want your pumpkins, make a batch of large cupcakes, regular cupcakes, or mini bundt cakes.
2. Make a batch of your favorite white icing while the cupcakes cool.  Tint the icing orange.  Make sure to serve a small portion of the icing to tint green for the tops, or just buy some green icing in a tube from the grocery store.
3. Take one large cupcake and cut the top off so it is flat.  Cover the flat top with orange icing.  Take another large cupcake and cut the top off.  Place the cut side down on top the icing.  Trim around the edge with a knife to make the cake more round.  Finally, cover the cakes with orange icing and make a stem with green icing.

Sunday, October 17, 2010

Key Lime Pie

Last weekend we had a dinner party to attend and I offered to make dessert.  We were having a big Southern meal so I wanted to make something that wouldn't be too heavy.  I love key lime pie, but have never actually made it, and this seemed like the perfect opportunity.  This recipe really is fabulous and everyone seemed to enjoy it.  If you don't want to take all the time necessary to juice the key limes, Nellie & Joe's Key Lime Juice is a surprisingly delicious substitution and really speeds up the process.

KEY LIME PIE
Adapted from Joe's Stone Crab

INGREDIENTS - CRUST
1 1/4 cup graham cracker crumbs
5 tablespoons melted butter
1/3 cup sugar

INGREDIENTS - FILLING
3 large egg yolks
1 1/2 teaspoons key lime zest (zest of 2 key limes)
1 14-ounce can sweetened condensed milk
2/3 cup freshly squeezed key lime juice

INGREDIENTS - TOPPING
1 cup cold heavy cream
2 tablespoons confectioners' sugar
1/4 teaspoon vanilla extract

DIRECTIONS
1. Preheat the oven to 350 degrees F. Butter a 9-inch round pie plate.

2. Combine the graham cracker crumbs, melted butter, and sugar.  Press the mixture into the bottom and up the sides of the pie pan.  Bake the crust until set and golden, about 8 minutes.  Set aside on a wire rack.  Leave the oven on.

3. Using the high speed of an electric mixer, beat the egg yolks and lime zest at high speed for 5 minutes. Gradually add the condensed milk and continue to beat until thick, 3 or 4 minutes longer. Add the lime juice and stir until combined, then pour the mixture into the crust.

4. Bake pie for 10 minutes or until the filling has just set.  Cool on a wire rack, then refrigerate.

5. Once the pie has cooled, whip the cream and confectioners' sugar, and vanilla until stiff peaks form.  Spread whipped cream over the pie or pipe around the edges.

6. Before serving, freeze the pie for about 20 minutes, then cut and serve.

Tuesday, September 21, 2010

Texas Sheet Cake

Since I have lived in Texas for more than two years now, I figured it was about time that I make a Texas sheet cake.  This recipe definitely makes a lot of cake and would be good for a picnic or cookout.  I knew it was dangerous for me to keep this much cake in the house, so my husband and I each ate a piece and then I took the rest of the cake to work.  It was well received at the office, and I will not hesitate to use this recipe again.
TEXAS SHEET CAKE
Adapted from Cookie Madness

INGREDIENTS - CAKE
2 cups all-purpose flour
2 cups minus 1 tablespoon granulated sugar
1/2 teaspoon salt
2 sticks unsalted butter
1/3 cup unsweetened natural cocoa powder
1 cup water
2 large eggs
1/2 teaspoon vanilla
1/2 cup buttermilk
1 teaspoon baking soda

INGREDIENTS - FROSTING
1 pound (about 3 3/4 cups) confectioners' sugar
1 stick unsalted butter
1/8 teaspoon salt
4 tablespoons unsweetened natural cocoa powder
7 tablespoons milk
1 teaspoon vanilla extract

DIRECTIONS
1. Preheat oven to 375 degrees F. Grease a 15x10 inch jelly roll pan.

2. Mix the flour, sugar, and salt in a large mixing bowl and set aside.

3. Melt butter in a small to medium size saucepan. Stir in the cocoa powder and water and bring to a boil. Pour the boiling cocoa mixture into the bowl with the flour mixture and mix with a spoon until blended.

4. In a second bowl, whisk together the eggs, vanilla, buttermilk, and baking soda. Add the egg mixture to the cocoa mixture and stir until blended - do not overmix.

5. Pour batter into the pan and bake for 20 to 25 minutes, or until a toothpick inserted into the center of the cake comes out clean. As soon as you pull the cake from the oven, start making the frosting.  To get a head start, you may want to sift the confectioners' sugar while the cake bakes.

6. For the icing, sift confectioners' sugar into a mixing bowl and set aside. Melt the butter in a saucepan over medium heat. When butter is almost melted, add the 4 tablespoons cocoa powder and 7 tablespoons milk and bring just to a boil. As soon as the mixture reaches a boil, remove from heat. Stir in vanilla extract. Pour the cocoa mixture into the bowl of sifted confectioners' sugar and whisk together until smooth.  Work quickly so that the frosting does not start to set up in the bowl.  Once the frosting is smooth, pour the frosting over the warm cake.  Allow cake to cool and frosting to set up before serving.

Tuesday, August 24, 2010

Marble Cupcakes

I recently baked some banana cupcakes for a baby shower, but I felt like I should also bake some cupcakes that were a more traditional flavor to take along as well.  That's where Martha Stewart comes in.  I baked her marble cupcakes.  They were fine, but nothing memorable or spectacular.  These are versatile and can be covered in a variety of icings.  I chose to use a chocolate icing and added some matching decor.

MARBLE CUPCAKES
From Martha Stewart's Cupcakes

YIELD - 16 CUPCAKES

INGREDIENTS
1 3/4 cups cake flour, sifted
2 teaspoons baking powder
1/2 teaspoon salt
1/3 cup milk, room temperature
1/3 cup heavy cream, room temperature
1/2 cup unsalted butter, room temperature
1 cup granulated sugar
3 large eggs, room temperature
1 teaspoon vanilla extract
1/3 cup unsweetened Dutch-process cocoa powder
1/4 cup boiling water

DIRECTIONS
1. Preheat oven to 350 degrees F. Line standard muffin tins with paper lines. Sift together cake flour, baking powder, and salt. Combine milk and cream.

2. With an electric mixer on medium-high speed, cream butter and granulated sugar until pale and fluffy. Add eggs, one at a time, beating until each is incorporated, scraping down sides of bowl as needed. Beat in vanilla. Add flour mixture in three batches, alternating with two additions of milk mixture, and beating until combined.

3. To make chocolate batter, measure out 1 cup batter, and transfer to another bowl. Combine cocoa and the boiling water in a bowl. Stir into reserved 1 cup batter.

4. Fill prepared cups with alternating spoonfuls of vanilla and chocolate batter, filling each three-quarters full. Run the tip of a paring knife or wooden skewer through batter in a figure-eight motion to make swirls. Bake, rotating tins halfway through, until tops are golden and a cake tester inserted in centers comes out clean, about 20 minutes. Transfer tins to wire racks to cool completely before removing cupcakes. Unfrosted cupcakes can be stored overnight at room temperature, or frozen up to 2 months in airtight containers.

Friday, August 20, 2010

Banana Cupcakes

For some reason, my husband and I have been doing a terrible job of eating bananas before they become overripe.  I have developed a habit of tossing the overripe bananas into the freezer, intending to use them at a later date for some unknown purpose.  The bananas are taking over, so I have drawn the line.  No more bananas can be added to the freezer supply!  Luckily, there was a baby shower at work just as my bananas were approaching that deliciously overripe stage.  I decided to make banana cupcakes for the shower and they turned out to be quite tasty.  I used a cream cheese icing, but you could also use vanilla or chocolate.  These cupcakes would also be good with a handful of mini chocolate chips thrown into the batter as well.

BANANA CUPCAKES
Adapted from allrecipes.com

YIELD - 18 CUPCAKES

INGREDIENTS - CUPCAKES
1/2 cup shortening
1 1/2 cups sugar
2 eggs
1 teaspoon vanilla extract
1 cup mashed ripe bananas
1/4 cup buttermilk
2 cups all-purpose flour
1 teaspoon baking powder
3/4 teaspoon baking soda
1/2 teaspoon salt

INGREDIENTS - ICING
1 (8 ounce) package cream cheese, softened
1/2 cup butter, softened
4 cups powdered sugar
1 teaspoon vanilla extract

DIRECTIONS
1. Preheat oven to 350 degrees F.

2. For the cake: In a large mixing bowl, cream shortening and sugar. Add eggs, vanilla, bananas, and buttermilk. Combine the flour, baking powder, baking soda, and salt.  Add flour mixture to banana mixture until just combined. Pour batter into 18 paper-lined muffin cups until cups are two-thirds full. Bake for 15-20 minutes or until a toothpick inserted in the center of a cupcake comes out clean.  Remove from oven, let stand for 10 minutes, then remove cupcakes from pan and cool on a wire rack.

3. For the icing: Beat softened cream cheese and butter until well blended. Add powdered sugar and vanilla and beat until smooth and creamy.  Ice cupcakes only after they have cooled completely.

Thursday, July 29, 2010

Peanut Butter Chocolate Layer Cake

I had a birthday in July and this is the cake I chose to make to celebrate.  I absolutely love the combination of peanut butter and chocolate and this cake fits the bill.  The peanut butter icing is rich without being too sweet, and would also taste delicious spread over a pan of chocolate brownies.

 PEANUT BUTTER CHOCOLATE LAYER CAKE

For the Cake - I used this classic Hershey's recipe that never fails:  http://www.hersheys.com/recipes/recipes/detail.asp?id=184. I made one and a half times the recipe and baked as directed in three 9-inch round pans.

INGREDIENTS - PEANUT BUTTER ICING
1 cup butter softened

2 cups creamy peanut butter (not natural)
1 teaspoon vanilla extract
6 tablespoons milk, or more as needed
5 cups powdered sugar

INGREDIENTS - GANACHE GLAZE
8 ounces semi-sweet chocolate, chopped
8 ounces heavy cream
1 teaspoon corn syrup

DIRECTIONS:
1. Bake cake and set aside to cool completely.

2. For the icing: Beat butter and peanut butter until creamy.  Add vanilla and beat until incorporated. Gradually beat in powdered sugar, adding milk as icing becomes stiff. Use more milk if necessary to achieve desired consistency. Beat for 2-3 minutes until fluffy.

3. For the ganache glaze: Place chopped chocolate in a bowl. Heat heavy cream until almost boiling, then pour cream over the chocolate. Let stand for one minute, then whisk until smooth and silky.  Whisk in corn syrup. Set aside to come to room temperature.

4. To assemble: Frost the three layer cake with the peanut butter icing. Place the frosted cake in the refrigerator while the ganache cools. Once ganache comes to room temperature, remove cake from refrigerator.  Pour some of the ganache onto the center of the top of the cake. Gently spread the ganache until it runs down over the sides. Work quickly because the ganache will begin to harden on the cold cake. You may not need to use all of the ganache to get a nice glaze.

5. Store cake in the refrigerator. Bring to room temperature before serving.

Wednesday, July 28, 2010

Strawberry Cream Cake

My husband and I went to a potluck a few weeks ago, so as usual, I volunteered to make dessert.  This recipe turned out to be a nice summer treat, and it makes for a lovely presentation.
STRAWBERRY CREAM CAKE

FOR THE CAKE:  I used this recipe: http://hannahinthekitchen.blogspot.com/2009/07/yellow-bundt-pound-cake.html.  The only changes I made were to bake the cake in a tube pan, and then cut the cake into three layers after it had cooled completely.

INGREDIENTS - CAKE
1 Yellow Bundt Pound Cake, cut into three layers

INGREDIENTS - FILLING
2 Quarts strawberries, hulled and cut in half length-wise
1 (8 ounce) package cream cheese, softened
1/2 cup sugar
1 teaspoon vanilla extract
1/8 teaspoon salt
2 cups heavy cream

DIRECTIONS:
1. Set the layers of cake and the hulled and cut strawberries aside.

2. For the cream filling:  In a large bowl, whip the cream cheese, sugar, vanilla, and salt together with an electric mixer on medium-high speed until light and fluffy, 1 to 2 minutes.  Reduce the mixer speed to low and gradually add the heave cream until combined. Increase the mixer speed to medium-high and whip until the mixture forms stiff peaks, about 2 to 3 minutes.

3. To assemble:  Place one of the cake layers on a platter. Arrange a ring of strawberry halves around the outside edge of the cake.  Fill in the rest of the layer with strawberry halves. Gently spread one-third of the cream filling (about 1 1/2 cups) over the top of the strawberries.  Repeat with the middle layer, layering cake, strawberries, and cream.  Place the final cake layer on top and spread with the remaining cream filling.  Arrange strawberries on top in a decorative pattern.

4. This is best served right away, but can be refrigerated for up to four hours.  Bring cake to room temperature before serving.

Tuesday, May 18, 2010

Cranberry Orange Scones

This was my first attempt at making any type of scone and they turned out surprisingly well.  I've never really been a big scones eater, but I felt like I should give scones a try since people seem to like them and they are a coffee house staple.  I would say I can now officially add scones to my repertoire.
CRANBERRY ORANGE SCONES
From Hannah's Kitchen

INGREDIENTS
2 cups unbleached all-purpose flour
1/3 cup sugar
1 teaspoon baking powder
1/4 teaspoon baking soda
1/2 teaspoon salt
2 teaspoons orange zest
8 tablespoons unsalted butter, frozen
3/4 cup dried cranberries
1/2 cup sour cream
1 large egg
1/2 teaspoon vanilla extract
coarse sugar for sprinkling

DIRECTIONS
1. Adjust oven rack to lower-middle position and heat to 400 degrees F.

2. In a large food processor bowl, combine flour, sugar, baking powder, baking soda, salt, and zest.  Pulse a few times to combine.  Cut frozen butter into chunks and add to the food processor.  Process until butter is incorporated and the mixture resembles coarse crumbs.  Stir in dried cranberries.

3. In a small bowl, whisk the sour cream, egg, and vanilla until smooth.

4. Pour the sour cream mixture into the flour mixture and pulse until just incorporated and the dough begins to clump together.  Do not overmix!

5. Place dough on a lightly floured work surface and form into a 7 to 8-inch circle about 3/4 inch thick. Sprinkle with the coarse sugar.  Use a sharp knife to cut dough into 8 triangles.  If the dough is too sticky to cut, spray the knife with cooking spray and then cut the dough.

6. Place the dough triangles about 1 inch apart on a parchment-lined baking sheet.  Bake until golden brown, about 15-17 minutes.  Cool for 5 minutes and serve warm, or cool completely and serve at room temperature.

Wednesday, April 28, 2010

Red Velvet Cake

This should have been posted long ago, but somehow got lost in the shuffle.  Several of my co-workers were starting a major diet plan on January 1, 2010, so everyone wanted one last piece of cake before the fasting began.  I made this red velvet cake and brought it to work on December 31, and it quickly disappeared.  I particularly enjoyed the icing, as it complements the cake well without being as sickeningly sweet as some other cream cheese icings I have tried.
Another photo for good measure...
RED VELVET CAKE
From America's Best Lost Recipes

INGREDIENTS - CAKE
2 1/4 cups all-purpose flour
1 1/2 teaspoons baking soda
Pinch salt
1 cup buttermilk
1 tablespoon white vinegar
1 teaspoon vanilla extract
2 large eggs
2 tablespoons natural cocoa powder
2 tablespoons (one 1-ounce bottle) red food coloring
2 tablespoons (1 1/2 sticks) unsalted butter, softened
1 1/2 cups granulated sugar

INGREDIENTS - ICING
16 tablespoons (2 sticks) unsalted butter, softened
4 cups confectioners' sugar
16 ounces cream cheese, cut into 8 pieces, softened
1 1/2 teaspoons vanilla extract
Pinch salt

DIRECTIONS
1. FOR THE CAKE: Adjust an oven rack to the middle position and heat the oven to 350 degrees. Grease and flour two 9-inch cake pans. Whisk the flour, baking soda, and salt in a medium bowl. Whisk the buttermilk, vinegar, vanilla, and eggs in a large measuring cup. Mix the cocoa with the food coloring in a small bowl until a smooth paste forms.

2. With an electric mixer on medium-high speed, beat the butter and granulated sugar together until fluffy, about 2 minutes. Add the flour mixture and the buttermilk mixture alternately in two batches, beating after each addition until combined. Add the cocoa mixture and beat on medium speed until completely incorporated. Divide the batter evenly between the prepared pans and bake until a toothpick inserted in the center comes out clean, about 25 minutes.  Cool the cakes in the pans 10 minutes, then turn out onto a rack to cool completely, at least 30 minutes.

3. FOR THE ICING: With an electric mixer on medium-high speed, beat the butter and confectioners' sugar until fluffy, about 2 minutes. Add the cream cheese, one piece at a time, and beat until incorporated. Beat in the vanilla and salt.

4. Spread about 2 cups frosting on one cake layer. Top with the second cake layer and spread the top and sides of the cake with the remaining frosting. Serve. (The cake can be refrigerated for up to 3 days.)

Sunday, April 4, 2010

Lower Fat Granola

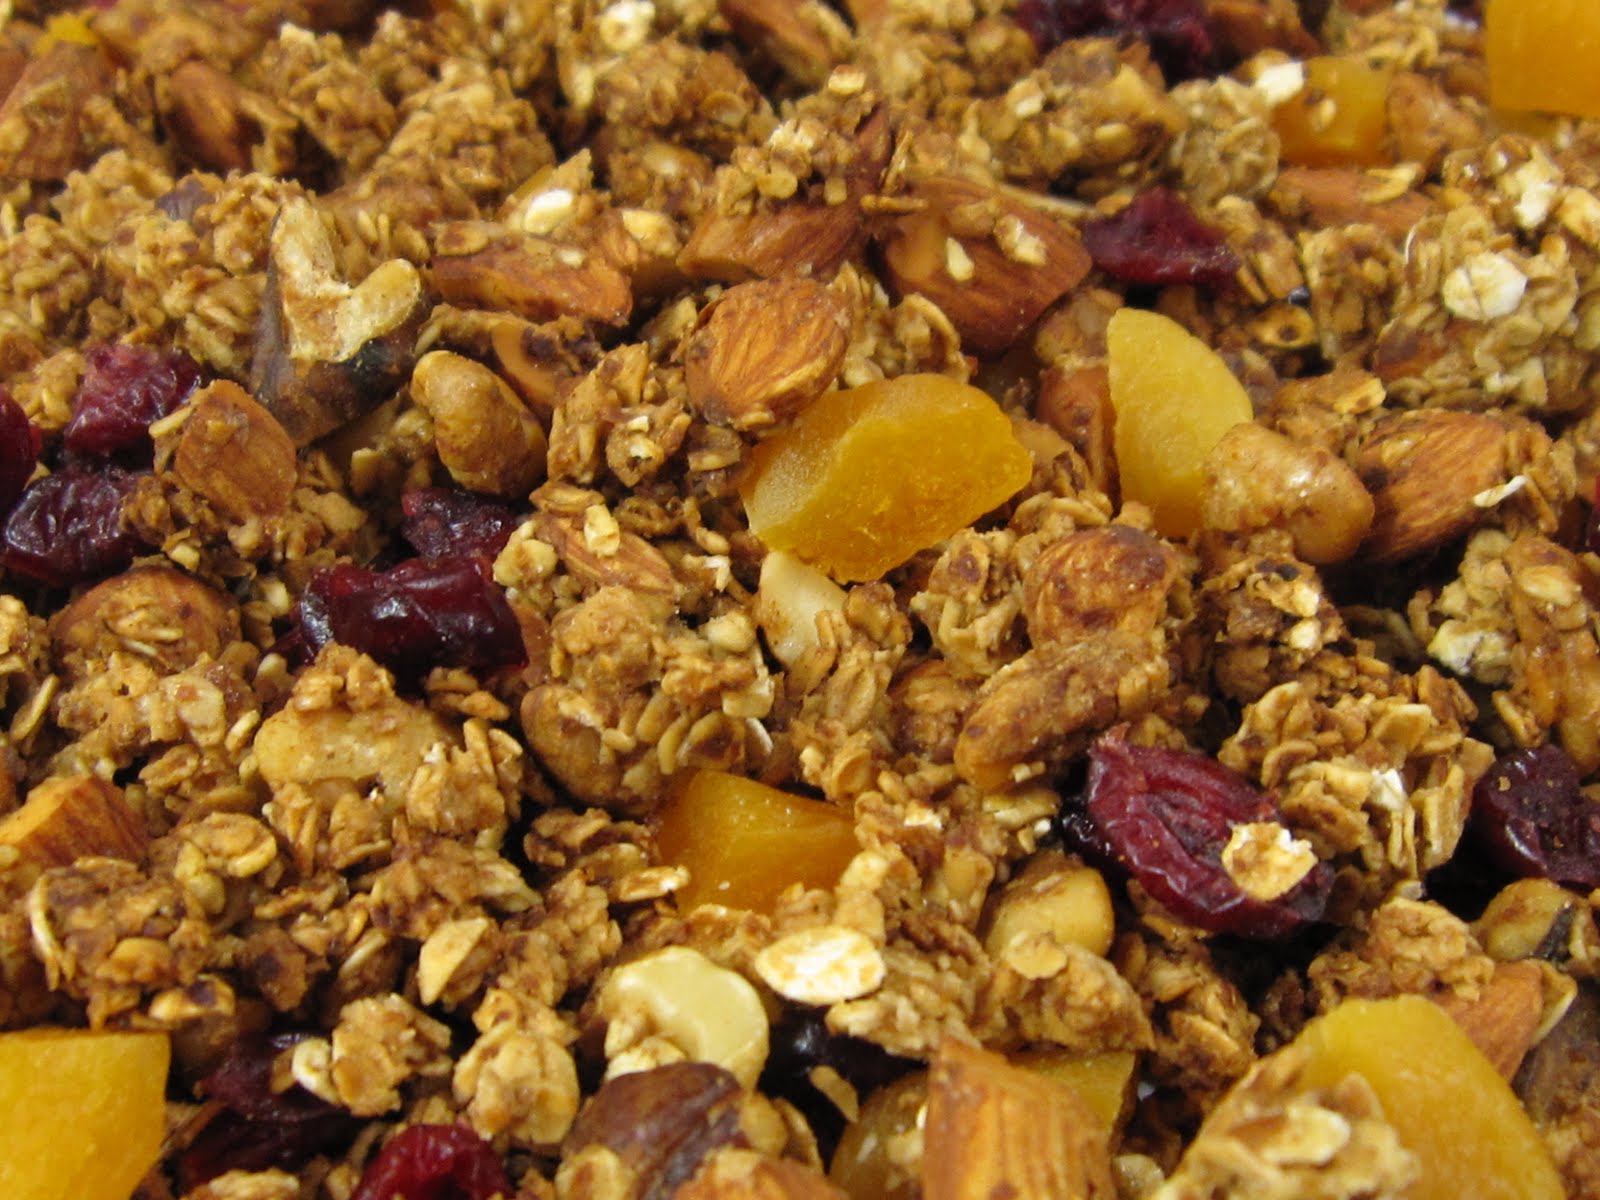
I have recently become interested in making homemade granola.  It is so incredibly expensive to buy, yet so easy (and much cheaper) to make at home.  Plus, it fills your house with a divine aroma as it bakes!  I like to use the oat mixture as a base, and then add different nuts and dried fruit to make new flavor combinations.  You can make lots of substitutions here - just make sure to keep the ratio of oat mixture to liquid mixture about the same.  This recipe is lower in fat than most because it uses only one tablespoon of oil.  If you don't have agave nectar you can substitute additional honey.
LOWER FAT GRANOLA
From Hannah's Kitchen

INGREDIENTS
2 1/2 cups old fashioned rolled oats
1/2 cup almonds, coarsely chopped
1/2 cup walnuts, coarsely chopped
1/4 cup wheat germ
1/4 cup light brown sugar
1 teaspoon cinnamon
1/2 teaspoon sea salt (omit if your nuts are salted)
6 tablespoons unsweetened applesauce
3 tablespoons agave nectar
2 tablespoons honey
1 tablespoon vegetable oil
1/4 cup dried apricots, diced
1/4 cup dried cranberries

DIRECTIONS
1. Preheat oven to 300 degrees F.

2. In a large bowl, mix together the oats, almonds, wheat germ, brown sugar, cinnamon, and salt.

3. In a small saucepan, warm the applesauce with the agave nectar, honey, and oil.

4. Mix the liquid into the dry ingredients until thoroughly combined, then spread the mixture evenly onto a rimmed baking sheet.

5. Bake granola for about 45 minutes, stirring every 10 minutes until the granola is deep golden brown.

6. Remove from oven and cool completely.  Add dried fruit and store in an airtight container for up to one month.