Monday, December 19, 2011

Candy Cane Blossoms

I very much enjoy peppermint bark, and the candy cane Hershey's Kisses are very reminiscent of the popular holiday treat.  While I was snacking away on some of the kisses this week I saw a cute little recipe on the back of the bag that I decided to make.  I promptly stopped my snacking so I would have enough candy left for the recipe!  These cookies are super festive and would make a wonderful addition to any holiday cookie tray.
This is what the packaging looks like.
Unwrap the candy.
Roll the dough balls in sugar.
Bake until the edges are lightly browned.
Pop the candy on top and enjoy!
Oh, and here is a random photo of my doggies just for fun. Sadie Sue is on the left and Zeus is on the right.
CANDY CANE BLOSSOMS
From Hershey's Kitchens

INGREDIENTS
48 Hershey's Kisses Candy Cane Mint Candies
1/2 cup (1 stick) butter, softened
1 cup granulated sugar
1 egg
1 1/2 teaspoons vanilla extract
2 cups all-purpose flour
1/4 teaspoon baking soda
1/4 teaspoon salt
2 tablespoons milk
Red or green sugar crystals, granulated sugar, or powdered sugar

DIRECTIONS
1. Heat oven to 350°F. Remove wrappers from candies.

2. Beat butter, granulated sugar, egg, and vanilla in large bowl until well blended. Stir together flour, baking soda and salt; add alternately with milk to butter mixture, beating until well blended.

3. Shape dough into 1-inch balls. Roll in red sugar, granulated sugar, powdered sugar or a combination of any of the sugars. Place on ungreased cookie sheet.

4. Bake 8 to 10 minutes or until edges are lightly browned and cookie is set. Remove from oven; cool 2 to 3 minutes. Press a candy piece into center of each cookie. Remove from cookie sheet to wire rack. Cool completely.

This post is linked to Sweets for a Saturday.

Sunday, December 18, 2011

Peanut Butter Buttercream Frosting

Sometimes I think the only reason I eat cake is for the frosting.  I just really really really love frosting.  When I was a kid, I used to eat all of the cake first, and then have a pile of frosting that I would eat separately after I had rid my plate of that pesky cake.  My tastes are slightly more refined these days, as I will go ahead and eat my cake and frosting together.  Nonetheless, this peanut butter frosting is so delicious I really could eat it on its own.  It tastes great on both cakes and brownies.
PEANUT BUTTER BUTTERCREAM FROSTING
From Hannah's Kitchen

INGREDIENTS
1 cup peanut butter
6 tablespoons unsalted butter, softened
1/2 teaspoon vanilla extract
1/4 teaspoon salt
2 cups powdered sugar
1/3 cup heavy cream

DIRECTIONS
1. Beat peanut butter, butter, vanilla, and salt in the bowl of a stand mixer until combined.

2. Gradually add in powdered sugar and heavy cream.

3. When the sugar and cream have been incorporated, beat the frosting on medium-high speed until fluffy, about 2 minutes.

This post has been linked to Sweets for a Saturday.

Saturday, November 19, 2011

Triple Chocolate Birthday Cake

My maternal grandmother celebrated her 90th birthday in October and this is the cake I made for her. It is a chocolate cake with chocolate mousse filling and dark chocolate frosting.  Grandma requested something chocolatey, and this cake definitely hit the chocolate nail on the head. Whenever we visited my grandparents when I was growing up there were always fabulous homemade desserts waiting to be eaten. My interests in baking were definitely influenced by these visits, as Grandma is a fabulous baker and cook. She still bakes and cooks, but I insisted that she did not bake her own birthday cake this year. I was happy to bake for her, and the end result was declared a huge success. This is truly a decadent cake that any chocolate lover will enjoy. 


TRIPLE CHOCOLATE BIRTHDAY CAKE

INGREDIENTS - MOUSSE
1 (14 ounce) can sweetened condensed milk
2 (1 ounce) squares unsweetened chocolate, melted
1/2 cup cold water
1 (3.4 ounce) package instant chocolate pudding mix
1 cup whipping cream, whipped to stiff peaks

INGREDIENTS - CAKE
2 cups sugar
1 3/4 cups all-purpose flour
3/4 cup cocoa powder
1 1/2 teaspoons baking powder
1 1/2 teaspoons baking soda
1 teaspoon salt
2 eggs
1 cup milk
1/2 cup vegetable oil
2 teaspoons vanilla extract
1 cup boiling water

INGREDIENTS - FROSTING
1 cup butter, softened
4 1/2 cups confectioners' sugar
1 cup Hershey's Special Dark baking cocoa
1/2 teaspoon vanilla extract
1/2 cup milk

DIRECTIONS
1. For the mousse - in large mixing bowl, beat sweetened condensed milk, and melted chocolate until well blended. Gradually beat in water and pudding mix until smooth. Chill at least 30 minutes. Beat until smooth. Fold in whipped cream. Chill at least 1 hour.

2. For the cake - preheat oven to 350 degrees. Line three 9-inch pans with parchment paper and spray pans with cooking spray. Stir together the sugar, flour, cocoa, baking powder, baking soda, and salt in a large bowl. Add eggs, milk, oil, and vanilla, and beat on medium speed of mixer for 2 minutes. Stir in boiling water (batter will be thin). Pour batter into prepared pans. Bake 22-25 minutes or until wooden pick inserted in center comes out clean. Cool 10 minutes; remove cakes from pans to wire racks. Cool cakes completely.

3. For the frosting - in a large mixing bowl, cream butter. Gradually beat in confectioners' sugar, cocoa, and vanilla. Add enough milk until frosting reaches spreading consistency. 

4. To assemble, place one cake round on a cake board or serving platter. Top with about 1 1/2 cups of the mousse. Add the second cake layer and top with about 1 1/2 cups of the mousse. Place the third cake layer on top. Cover the top and sides of the cake with the dark chocolate frosting. Store cake in the refrigerator.

This post is linked to Sweets for a Saturday and Sweet Tooth Friday.

Friday, November 11, 2011

Chocolate Irish Cream Whoopie Pies

I made these little beauties a few weeks ago to take along to a wine party and they were fantastic!  I brought a bottle of wine, but some boozy treats seemed like a nice addition to the appetizer spread.  I really wanted to make cupcakes with this frosting, but the whoopie pies are so much easier to eat when standing around and holding a glass in one hand.  I made mine quite small, but you can make the cakes any size you wish - just watch the cooking time.  If you don't want the alcohol in the frosting, you could probably try substituting some Irish cream liquid coffee creamer to get a similar flavor.

CHOCOLATE IRISH CREAM WHOOPIE PIES
Adapted from Whoopie Pies, By Sarah Billingsley and Amy Treadwell

INGREDIENTS - CAKE
1 2/3 cups all-purpose flour
2/3 cup unsweetened cocoa powder
1 1/2 teaspoons baking soda
1/2 teaspoon salt
4 tablespoons unsalted butter, room temperature
4 tablespoons vegetable shortening
1 cup packed dark brown sugar
1 large egg
1 teaspoon vanilla extract
1 cup milk

INGREDIENTS - FILLING
3 cups powdered sugar
1 stick (4 ounces) butter, softened
4 tablespoons Irish cream liqueur
2 tablespoons milk or cream


DIRECTIONS
1. For the cakes, position rack in center of oven and preheat oven to 375 degrees. Line two baking sheets with parchment paper.

2. Sift together the flour, cocoa powder, baking soda, and salt onto a sheet of waxed paper. In the work bowl of a stand mixer fitted with the paddle attachment, beat together the butter, shortening, and brown sugar on low speed until just combined. Increase the speed to medium and beat until fluffy and smooth, about 3 minutes. Add the egg and vanilla and beat for another 2 minutes.

3. Add half of the flour mixture and half of the milk to the batter and beat on low until just incorporated. Scrape down the sides of the bowl. Add the remaining flour mixture and 1/2 cup milk and beat until completely combined.

4. Using a spoon, drop about 1 tablespoon of batter onto one of the prepared baking sheets and repeat, spacing them at least 2 inches apart. Bake one sheet at a time for about 10 minutes each, or until the pies spring back when pressed gently. Remove from the oven and let cakes cool on the sheet for about 5 minutes before transferring to a rack to cool completely.

5. For the filling, in the work bowl of a stand mixer fitted with the paddle attachment, beat together the powdered sugar, butter, and liqueur.  Add milk or cream until desired consistency is achieved.  Beat until fluffy.

6. To assemble, spread or pipe filling onto flat side of one cake and top it with another cake, flat-side down. Repeat with the rest of the cakes and filling.

This post is linked to Sweets for a Saturday.

Sunday, October 30, 2011

Oreo Brownies

It seems like everyone out in food blog land is baking with Oreo cookies, so I decided to jump on the bandwagon and throw some Oreos into a classic fudgy brownie recipe.  The Oreos in the brownie add a nice little crunch and texture, but its the Oreo frosting that really puts these brownies over the top.  This is one of my new favorites.  If you are not up to the task of making a homemade brownie you can substitute a boxed mix.  However, this is a one bowl brownie recipe so it is not much more work to just go ahead and make it from scratch.
OREO BROWNIES

INGREDIENTS - BROWNIES
4 (1 ounce) squares unsweetened chocolate
3/4 cup butter
2 cups white sugar
3 eggs
1 teaspoon vanilla extract
1 cup all-purpose flour
15 Oreo cookies, cut into quarters

INGREDIENTS - FROSTING
1 stick (4 ounces) unsalted butter, softened
3 cups powdered sugar
1/2 teaspoon vanilla extract
2-3 tablespoons milk
8 Oreo cookies, finely crushed
pinch of salt

DIRECTIONS
1. Preheat oven to 350 degrees F. Set aside a greased 9 x 13 inch pan.

2. Chop the chocolate.  Microwave chocolate and butter in large bowl for 2 minutes or until butter is melted. Stir until chocolate is melted. Stir in sugar. Mix in eggs and vanilla. Stir in flour just until combined.

3. Sprinkle the quartered Oreo cookies into the prepared pan. Pour batter over the cookies in an even layer. Bake for 30-35 minutes or until a toothpick inserted in the center comes out with fudgy crumbs, taking care not to overbake. Cool brownies completely.

4. For the frosting, beat together the butter, powdered sugar, and vanilla extract. Add milk as needed and beat until fluffy. Add in crushed Oreo cookies, mixing until combined. Spread frosting over cooled brownies.  If desired, chop some of the leftover Oreos and sprinkle them over the frosting for garnish.

This post is linked to Sweets for a Saturday.

Saturday, October 15, 2011

Oatmeal Cream Pies

While I enjoy a nice traditional whoopie pie, I couldn't wait to try this variation.  It tastes kind of like a Little Debbie oatmeal cream pie, only much more delicious!  The oats give a nice texture to the cakes, and the sweet filling pairs so incredibly well with the cinnamon spiced cakes.  I brought these to work and they were quickly devoured.

OATMEAL CREAM PIES
Adapted slightly from "Whoopie Pies"

INGREDIENTS - CAKE
4 tablespoons unsalted butter, softened
1/2 cup light brown sugar
1/4 cup granulated sugar
2 large eggs
1 1/2 cups rolled oats (not fast-cooking)
3/4 cup all-purpose flour
1/2 teaspoon baking soda
1/2 teaspoon ground cinnamon
1 teaspoon salt

INGREDIENTS - FILLING
3 cups powdered sugar
1/2 cup (1 stick) unsalted butter, softened
3 to 4 tablespoons heavy cream
1 teaspoon vanilla extract
pinch of salt

DIRECTIONS
1. For the cakes, preheat the oven to 350 degrees F. Line two baking sheets with parchment paper.

2. In a large mixer bowl, beat together the butter and both sugars on low speed. Increase the speed to medium and beat until fluffy and smooth, about 3 minutes. Beat in the eggs one at a time. Add the vanilla and beat until light and creamy, about 3 minutes.

3. In a food processor or blender, process 3/4 cup of the oatmeal until it resembles whole grain flour. Transfer the ground oatmeal to a medium bowl and add the remaining oatmeal, flour, baking soda, cinnamon, and salt. Add the oatmeal mixture to the butter-sugar mixture and beat on low speed until just combined.

4. Using a spoon or small cookie scoop, drop about 1 tablespoon of batter onto one of the prepared baking sheets and repeat, spacing them at least 2 inches apart. Bake one sheet at a time for about 11 minutes each or until the cookies begin to brown. Remove from the oven and let the cakes cool on the sheet for about 5 minutes before transferring them to a cooling rack to cool completely.

5. For the filling, in the work bowl of a mixer, beat together the powdered sugar and butter, starting on low and increasing to medium speed until the mixture is crumbly, about 1 minute. Add the cream, vanilla, and salt and beat on high speed until smooth, about 3 minutes.

6. To assemble, spread filling onto the flat side of one cooled cake and top it with another cake, flat side down. Repeat with the rest of the cakes and filling.

This post is linked to Sweets for a Saturday.

Friday, September 16, 2011

Peanut Butter Cheesecake Brownies

Normally I steer clear of recipes using boxed mixes, but I just couldn't resist giving these a try.  I'm a sucker for anything with peanut butter, especially when that peanut butter is mixed with chocolate!  I was short on time and needed something for a potluck and this was easy and fairly impressive looking.  Plus, everyone at the potluck agreed that they were really tasty.  I cut the bars into small squares since they are pretty rich.  If you are feeling like going the extra mile, you could replace the boxed brownie mix with any homemade brownie batter that fits a 9 x 13 inch pan.

PEANUT BUTTER CHEESECAKE BROWNIES
Adapted from Pip and Ebby

INGREDIENTS
19.5 ounce box chocolate fudge brownie mix
8 ounce package cream cheese, softened
14 ounce can sweetened condensed milk
1/2 cup creamy peanut butter
12 ounce package milk chocolate chips
3 tablespoons whipping cream
12 large Reese's Peanut Butter Cups, chopped

DIRECTIONS
1. Preheat oven to 350 degrees F. Lightly coat a 9x13 inch pan with cooking spray.

2. Prepare the brownie mix according to package directions. Spread the batter in the prepared pan and set aside. In a large bowl, beat cream cheese until fluffy. Add condensed milk and peanut butter and beat until smooth. Spoon the mixture over the brownie batter and spread evenly.

3. Bake for 35-40 minutes or until cheesecake layer is set and edges are golden brown Cool for 30 minutes and refrigerate for 30 minutes.

4. In a small microwaveable bowl, microwave the chocolate chips and whipping cream for 1 minute, or until chips are melted. Stir until smooth. Spread over cheesecake layer. Sprinkle Reese's Peanut Butter Cup pieces over the warm chocolate and refrigerate until completed cooled before cutting into squares.  Store finished bars in the refrigerator.

This post is linked to Sweet Tooth Friday and Sweets for a Saturday.

Sunday, August 21, 2011

Carrot Pineapple Cake

I officially have a new favorite carrot cake recipe, and this is it!  It is similar to my old favorite, in that the ingredients include crushed pineapple and coconut.  The cake turns out to be super moist but not too dense or greasy, which can be an issue with carrot cakes.  I brought this cake to work to celebrate some August birthdays and it was well received.  Definitely don't skip the cream cheese icing!
The dry ingredients.
 The wet ingredients.
 Incorporating the wet and dry.
 Adding the pineapple, walnuts, coconut, and carrots.
 Ready for the oven.
 The cooling cakes.
 The cream cheese icing is whipped until light and fluffy.
 Assembling the cake.
 The finished product.
CARROT PINEAPPLE CAKE
Adapted slightly from allrecipes.com

INGREDIENTS - CAKE
3 eggs
3/4 cup buttermilk
3/4 cup vegetable oil
1 1/2 cups white sugar
2 teaspoons vanilla extract
2 teaspoons ground cinnamon
1/4 teaspoon salt
2 cups all-purpose flour
2 teaspoons baking soda
2 cups shredded carrots
1 cup flaked coconut
1 cup chopped walnuts
1 (8 ounce) can crushed pineapple with juice

INGREDIENTS - ICING
16 tablespoons (2 sticks) unsalted butter, softened
16 ounces cream cheese, softened
1 1/2 teaspoons vanilla extract
6 cups confectioners' sugar
Pinch of salt

DIRECTIONS 
1. Preheat oven to 350 degrees F (175 degrees C). Grease and flour three 9-inch round pans. Line bottom of pans with parchment. 

2. In a medium bowl, sift together flour, baking soda, salt and cinnamon. Set aside. 

3. In a large bowl, combine eggs, buttermilk, oil, sugar and vanilla. Mix well. Add flour mixture and mix well. 

4. In a medium bowl, combine shredded carrots, coconut, walnuts, and pineapple. 

5. Using a large wooden spoon or a very heavy whisk, add carrot mixture to batter and fold in well. 

6. Pour batter into prepared pans and bake for 22-25 minutes, or until a toothpick comes out clean.

7. Allow cakes to cool in pans for 10 minutes, then turn out onto wire racks and cool completely.

8. For the Icing - With an electric mixer on medium-high speed, beat the butter and cream cheese until fluffy.  Slowly add powdered sugar until desired sweetness is reached.  Beat in the vanilla and salt.  Beat for about two more minutes until icing is light and fluffy.  Spread icing over cooled cake.

This post is linked to Sweets for a Saturday and Sweet Indulgences Sunday.

Friday, August 19, 2011

Banana Bread

Once again, I had an over abundance of overly ripe bananas on my counter.  I usually try to find something more exciting to make with my stash of over ripe bananas, but every once in a while a loaf of banana bread just hits the spot.  This was a pretty good recipe, and could definitely be doctored up with some mini chocolate chips or some chopped nuts.
 BANANA BREAD
Adapted from The America's Test Kitchen Family Baking Book

INGREDIENTS
2 cups (10 ounces) all-purpose flour
3/4 cup (5 1/4 ounces) sugar
3/4 teaspoon baking soda
1/2 teaspoon salt
3 large very ripe bananas, mashed well (1 1/2 cups)
6 tablespoons unsalted butter, melted and cooled
2 large eggs
1/4 cup sour cream
1 teaspoon vanilla extract

DIRECTIONS
1. Adjust an oven rack to the lower-middle position and heat the oven to 350 degrees. Grease an 8 1/2 by 4 1/2 inch loaf pan.

2. Whisk the flour, sugar, baking soda, and salt together in a large bowl. In a medium bowl, whisk the mashed bananas, melted butter, eggs, sour cream, and vanilla together. Gently fold the banana mixture into the flour mixture with a rubber spatula until just combined (do not overmix) The batter will look thick and chunky.

3. Scrape the batter into the prepared pan and smooth the top. Bake until golden brown and a toothpick inserted into the center comes out with just a few crumbs attached, about 55 minutes, rotating the pan halfway through baking.

4. Let the loaf cool in the pan for 10 minutes, then turn out onto a wire rack and let cool for 1 hour before serving.

This post is linked to Sweets for a Saturday.

Tuesday, August 2, 2011

Whoopie Pies

I got a fabulous whoopie pies cookbook several months ago and while I had perused it several times, I had never made any of the recipes.  That all changed this past week when I made a traditional chocolate pie with marshmallow cream filling.  I made my cakes small, but they can definitely be made into a bigger and more substantial dessert.  These were delicious, and I cannot wait to try some of the book's other fun flavor combinations!
 The cooled cakes.
 
 The creamy marshmallow filling.
 Super cute and super tasty!
 WHOOPIE PIES
Adapted slightly from Whoopie Pies, By Sarah Billingsley and Amy Treadwell

INGREDIENTS - CAKE
1 2/3 cups all-purpose flour
2/3 cup unsweetened cocoa powder
1 1/2 teaspoons baking soda
1/2 teaspoon salt
4 tablespoons unsalted butter, room temperature
4 tablespoons vegetable shortening
1 cup packed dark brown sugar
1 large egg
1 teaspoon vanilla extract
1 cup milk

INGREDIENTS - FILLING
1 1/2 cups marshmallow cream
1 1/4 cups vegetable shortening
2 1/2 cups powdered sugar
1 teaspoon vanilla extract

DIRECTIONS
1. For the cakes, position rack in center of oven and preheat oven to 375 degrees. Line two baking sheets with parchment paper.

2. Sift together the flour, cocoa powder, baking soda, and salt onto a sheet of waxed paper. In the work bowl of a stand mixer fitted with the paddle attachment, beat together the butter, shortening, and brown sugar on low speed until just combined. Increase the speed to medium and beat until fluffy and smooth, about 3 minutes. Add the egg and vanilla and beat for another 2 minutes.

3. Add half of the flour mixture and half of the milk to the batter and beat on low until just incorporated. Scrape down the sides of the bowl. Add the remaining flour mixture and 1/2 cup milk and beat until completely combined.

4. Using a spoon, drop about 1 tablespoon of batter onto one of the prepared baking sheets and repeat, spacing them at least 2 inches apart. Bake one sheet at a time for about 10 minutes each, or until the pies spring back when pressed gently. Remove from the oven and let cakes cool on the sheet for about 5 minutes before transferring to a rack to cool completely.

5. For the filling, in the work bowl of a stand mixer fitted with the paddle attachment, beat together the marshmallow cream and vegetable shortening, starting on low and increasing to medium speed until the mixture is smooth and fluffy, about 3 minutes. Reduce mixer speed to low, add the powdered sugar and vanilla, and beat until incorporated. Increase mixer speed to medium and beat until fluffy, about 3 minutes more.

6. To assemble, spread filling onto flat side of one cake and top it with another cake, flat-side down. Repeat with the rest of the cakes and filling.

This post is linked to Sweets for a Saturday, Sweet Tooth Friday, and This Chick Cooks.

Sunday, July 17, 2011

Peanut Butter Blossoms

I usually only make these cookies during the holidays.  However, I ended up with a large quantity of Hershey's kisses after some work meetings and I decided the best way to use them up was by making these cookies.  In case you were wondering, they still taste good in the summertime!
PEANUT BUTTER BLOSSOMS 
From allrecipes.com

INGREDIENTS
1/2 cup shortening
1/2 cup creamy peanut butter
1/2 cup firmly packed brown sugar
1/2 cup sugar
1 large egg
2 tablespoons milk
1 teaspoon vanilla
1 3/4 cups all-purpose flour
1 teaspoon baking soda
1/2 teaspoon salt
Sugar
48 foil-wrapped milk chocolate pieces, unwrapped (such as Hershey's Kisses)

DIRECTIONS 
1.  Preheat oven to 375 degrees F. 

2.  Cream together shortening, peanut butter, brown sugar and 1/2 cup sugar. Add egg, milk and vanilla. Beat well. 

3.  Stir together flour, baking soda and salt. Add to creamed mixture. Beat on low speed just until stiff dough forms. 

4.  Shape into 1-inch balls. Roll in sugar. Place 2 inches apart on ungreased cookie sheet. 

5.  Bake for 10 to 12 minutes or until golden brown. 

6.  Top each cookie immediately with an unwrapped chocolate piece, pressing down firmly so that cookie cracks around edge. Remove from cookie sheets to cool.

This post is linked to Sweets for a Saturday.

Friday, June 17, 2011

Dark Chocolate Chip Cookies with Cherries

My parents visited a few weeks ago and I had to make sure I had some homemade cookies on hand.  I looked through the pantry and grabbed the bittersweet chocolate chips and dried cherries.  The tart dried cherries and smooth, sweet dark chocolate complement each other very well in these cookies.  I'm sure semi-sweet chips would work as well, but the higher quality Ghiradelli bittersweet chips really put these cookies over the top.
DARK CHOCOLATE CHIP COOKIES WITH CHERRIES
From Hannah's Kitchen

INGREDIENTS
1/2 cup butter, softened
1/2 cup shortening
3/4 cup brown sugar
3/4 cup white sugar
2 eggs
1 teaspoon vanilla extract
2 1/2 cups all-purpose flour
1/2 teaspoon salt
1 teaspoon baking soda
1 1/2 cups dried cherries
2 cups bittersweet chocolate chips (60% cacao)

DIRECTIONS:
1. Preheat oven to 350 degrees F.

2. Cream butter, shortening, and sugars together until light and fluffy.  Mix in vanilla and eggs until combined.  In a separate bowl, combine flour, salt, and baking soda.  Add flour mixture to butter mixture until combined.  Stir in chocolate chips and dried cherries.

3. Drop dough by tablespoonfuls onto parchment-lined baking sheets.  Bake for 8-10 minutes or until edges are set and just turning light brown.  Cool on cookie sheets for a few minutes before removing to wire racks to cool completely.

This post is linked to Sweets for a Saturday and Sweet Indulgences Sunday.

Friday, June 10, 2011

Banana Chocolate Chip Bundt Cake

Every so often I end up with a bunch of overripe bananas, which of course requires me to bake something so the bananas don't go to waste.  Instead of making banana bread, I thought I would try this cake.  It is a little bit lighter than banana bread, and the chocolate chips make it a little more exciting.  This cake is great with a little powdered sugar sprinkled on top, and is also very good served warm.

BANANA CHOCOLATE CHIP BUNDT CAKE
Adapted from allrecipes.com

INGREDIENTS
1/3 cup shortening
1 1/4 cups sugar
2 eggs
1 teaspoon vanilla extract
1 1/4 cups mashed ripe bananas
2 cups all-purpose flour
1 1/4 teaspoons baking powder
1 teaspoon baking soda
1/2 teaspoon salt
1 cup sour cream
1 cup mini semi-sweet chocolate chips
confectioners' sugar

DIRECTIONS
1. Preheat oven to 350 degrees F. Grease and flour one bundt pan.

2. In a mixing bowl, cream the shortening and sugar. Add the eggs, one at a time, beating well after each addition. Blend in vanilla. Add bananas and mix well. 

3. Combine flour, baking powder, baking soda and salt; add to the creamed mixture alternately with sour cream, stirring just until combined. Stir in chocolate chips. 

4. Pour batter into prepared bundt pan and bake for 50 minutes or until cake tests done. Cool 10 minutes in pan before removing to a wire rack to cool completely. Dust with confectioners' sugar before serving.

This post is linked to Sweets for a Saturday and A Themed Baker's Sunday.

Sunday, June 5, 2011

Chewy Triple Chocolate Cookies

I really like white chocolate. When I was younger, Nestle made an Alpine White bar, which happened to be one of my favorite Halloween candies.  Some time ago they stopped making Alpine White bars, and I've had to satisfy my white chocolate tooth with Hershey's Cookies 'n' Creme bars.  If you've never had the Cookies 'n' Creme bar, it is a white chocolate bar speckled with crunchy pieces of chocolate cookie.  I recently bought a bag of new Hershey's Cookies 'n' Creme drops, which I really wanted to incorporate into a baked good of some sort.  I settled on a super fudgy chocolate cookie, and then cut up the drops and added them in.  The result was a super rich, almost brownie-like cookie that was quickly devoured at the office.  If you decide to make these without the Cookies 'n' Creme drops, just add an extra cup of chocolate chips instead.
 The Cookies 'n' Creme drops.
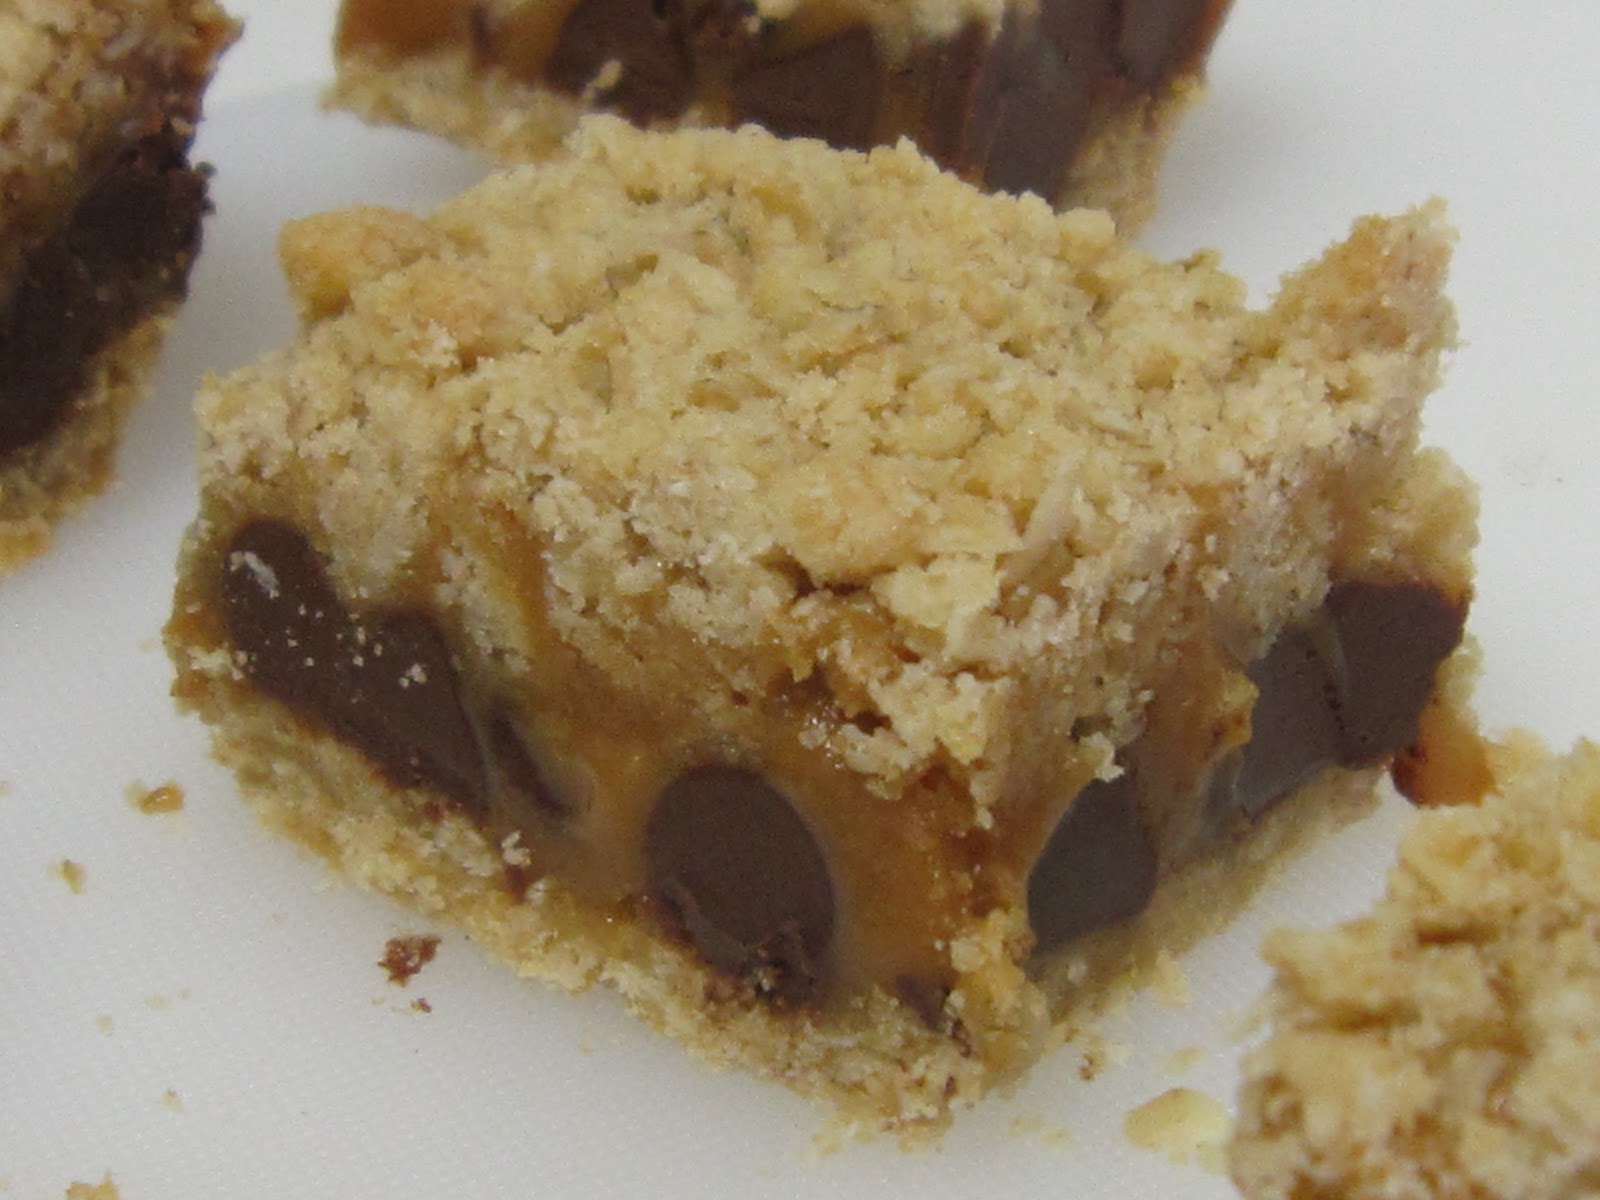
 The cookie turns out tasting like a super rich and fudgy brownie.
CHEWY TRIPLE CHOCOLATE COOKIES
Adapted from The America's Test Kitchen Family Baking Book

INGREDIENTS
2 cups (10 ounces) all-purpose flour
1/2 cup (1 1/2 ounces) Dutch-processed cocoa powder
2 teaspoons baking powder
3/4 teaspoon salt
4 large eggs
2 teaspoons vanilla extract
1/2 teaspoon instant espresso
10 tablespoons (1 1/4 sticks) unsalted butter, softened
1 1/2 cups packed (10 1/2 ounces) light brown sugar
1/2 cup (3 1/2 ounces) granulated sugar
16 ounces semisweet chocolate, melted and cooled
1 cup (6 ounces) semisweet chocolate chips
1 to 1 1/2 cups chopped Hershey's Cookies 'n' Creme drops

DIRECTIONS
1. Preheat oven to 350 degrees. Line baking sheets with parchment paper.

2. Whisk the flour, cocoa, baking powder, and salt together in a medium bowl. In a small bowl, whisk the eggs, vanilla, and instant espresso together until the espresso is dissolved.

3. In a large bowl, beat the butter and sugars together with an electric mixer on medium speed until light and fluffy, 3 to 6 minutes, scraping down the bowl and beaters as needed. Beat in the egg mixture until incorporated, about 30 seconds. Beat in the melted chocolate, about 30 seconds.

4. Reduce mixer speed to low and slowly add the flour mixture until combined, about 30 seconds. Stir in the chocolate chips and chopped Cookies 'n' Creme drops until incorporated. Cover the bowl of dough with plastic wrap and let stand at room temperature until the consistency is scoopable and fudge-like, about 30 minutes.

5. Working with 3 tablespoons of dough at a time, roll the dough into balls and lay them on prepared baking sheets, spaced about 2 inches apart. Bake the cookies until the edges are set and beginning to brown, but the centers are still soft and puffy, about 10 to 12 minutes. (The cookies will look raw between the cracks and seem underdone.)

6. Let the cookies cool on the baking sheet for 10 minutes, then transfer to a wire rack to cool.

This post is linked to Sweets for a Saturday and This Chick Cooks.

Monday, May 23, 2011

Cinnamon Swirl Coffee Cake

This coffee cake looks beautiful and tastes just as good.  Instead of being dense and heavy, the cake is lighter than you might expect.  The first time I made this cake I followed the recipe exactly as written.  The photos below reflect my first attempt.  The second time I made this cake I doubled the cinnamon streusel and it was fabulous.  I have never added the nuts, but I'm sure they would taste great. If you don't have maple syrup, or don't like maple, just mix a little milk with the powdered sugar to make the glaze.  I definitely recommend doubling the streusel, and I have written the recipe below to reflect the increased amount.

 CINNAMON SWIRL COFFEE CAKE
Adapted from Ina Garten

INGREDIENTS - CAKE
12 tablespoons (1 1/2 sticks) unsalted butter at room temperature
1 1/2 cups granulated sugar
3 extra-large eggs at room temperature
1 1/2 teaspoons pure vanilla extract
1 1/4 cups sour cream
2 1/2 cups cake flour (not self-rising)
2 teaspoons baking powder
1/2 teaspoon baking soda
1/2 teaspoon salt

INGREDIENTS - STREUSEL
1/2 cup light brown sugar, packed
1 cup all-purpose flour
3 teaspoons ground cinnamon
1/2 teaspoon salt
6 tablespoons cold unsalted butter, cut into pieces
1 1/2 cups chopped walnuts, optional

INGREDIENTS - GLAZE
1/2 cup confectioners’ sugar
2 tablespoons real maple syrup

DIRECTIONS
1. Preheat the oven to 350° F. Grease and flour a 10-inch tube pan.

2. Cream the butter and sugar in the bowl of an electric mixer fitted with the paddle attachment for 4 to 5 minutes, until light. Add the eggs one at a time, then add the vanilla and sour cream. In a separate bowl, sift together the flour, baking powder, baking soda, and salt. With the mixer on low, add the flour mixture to the batter until just combined. Finish stirring with a spatula to be sure the batter is completely mixed.

3. For the streusel, place the brown sugar, flour, cinnamon, salt, and butter in a bowl and pinch together with your fingers until it forms a crumble. Mix in the walnuts, if desired.

4. Spoon half the batter into the pan and spread it out with a knife. Sprinkle with half of the streusel. Spoon the rest of the batter in the pan, spread it out, and scatter the remaining streusel on top. Bake for 50 to 60 minutes, until a cake tester comes out clean.

5. Let cool on a wire rack for at least 30 minutes. Carefully transfer the cake, streusel side up, onto a serving plate. Whisk the confectioners’ sugar and maple syrup together, adding a few drops of water if necessary, to make the glaze runny. Drizzle as much as you like over the cake with a fork or spoon.

This post is liked to Sweets for a Saturday and This Chick Cooks.

Friday, May 13, 2011

German Chocolate Cake

I am a novice when it comes to German chocolate cake.  I've eaten it a few times, but had never made it or even thought about making it before.  When a co-worker said she wanted German chocolate cake for her birthday I jumped at the chance to give it a try.  I'm always looking to expand my baking repertoire.  Making the frosting turned out to be quite a process and took some patience, but it was well worth the effort.  This cake earned rave reviews from the birthday girl and everyone else who was lucky enough to try some.


GERMAN CHOCOLATE CAKE

INGREDIENTS - CAKE
2 cups sugar
1 3/4 cups all-purpose flour
3/4 cup unsweetened cocoa powder
1 1/2 teaspoons baking powder
1 1/2 teaspoons baking soda
1 teaspoon salt
2 eggs
1 cup milk
1/2 cup vegetable oil
2 teaspoons vanilla extract
1 cup boiling water

INGREDIENTS - FROSTING
1 1/2 cups evaporated milk (12 ounce can)
1 1/2 cups white sugar
5 egg yolks, beaten with 1 1/2 teaspoons water
3/4 cup margarine
1 1/2 teaspoons vanilla extract
1 1/2 cups chopped pecans
1 1/2 cups sweetened flaked coconut

DIRECTIONS
1. Preheat oven to 350 degrees. Line two 9-inch pans with parchment paper and spray pans with cooking spray.

2. Stir together sugar, flour, cocoa, baking powder, baking soda, and salt in a large bowl. Add eggs, milk, oil, and vanilla, a beat on medium speed of mixer for 2 minutes. Stir in boiling water (batter will be thin). Pour batter into prepared pans.

3. Bake 25-30 minutes or until wooden pick inserted in center comes out clean. Cool 10 minutes; remove from pans to wire racks. Cool completely before frosting.
4. For the frosting, in a large saucepan combine evaporated milk, sugar, egg yolks, margarine and vanilla.  Cook over medium-low heat, stirring constantly.  Once mixture is hot, gradually increase the temperature until the mixture nearly boils.  Continue stirring constantly until mixture is thick.  Remove from heat.  Strain mixture if you see any bits of cooked egg.  Then stir pecans and coconut into the thickened sugar mixture.  Cool slightly until frosting firms a bit more but is still spreadable.  Spread frosting between cake layers.

This post is linked to Sweets for a Saturday.

Thursday, May 5, 2011

Caramel Oat Bars

Sometimes I make impulse buys when I'm shopping in the baking aisle.  A while back I bought a bag of Kraft unwrapped caramel bits not knowing what to do with them.  I liked the idea of not having to unwrap a bunch of caramels, but did not have any plans or desire to bake anything with caramel.  After seeing the bag of caramel bits sitting in my pantry for a few months I decided I better just go looking for something to make.  I found several versions of caramel oat bars on the internet, and combined recipes to get the bars that I made.  The caramel was nice and gooey and paired well with the oats and chocolate chips.  Just make sure to cool the bars completely before cutting or you may have a mess!
 CARAMEL OAT BARS
From Hannah's Kitchen

INGREDIENTS
1 package (11 ounces) Kraft caramel bits
3 tablespoons milk
1 cup all-purpose flour
1 cup regular or quick cooking oats (not instant) 
3/4 cup firmly packed brown sugar
1/2 teaspoon baking soda
1/4 teaspoon salt
1/2 cup butter, softened
1 cup (6 ounces) semisweet chocolate chips

DIRECTIONS
1. Preheat oven to 350 degrees. Combine caramels and milk in a saucepan; cook over low heat, stirring constantly, until caramels melt. Set mixture aside.

2. Combine flour, oats, sugar, baking soda, salt, and butter, stirring until mixture is crumbly. You can also just use your hands to mix until crumbly. Press half of the crumb mixture into a greased 8 x 8 inch baking pan. Bake at 350 for 10 minutes. 

3. Remove crust from oven and sprinkle with chocolate chips. Pour caramel mixture evenly on top. Sprinkle on remaining crumbs. Bake at 350 for 15-18 minutes, or until bars are lightly browned. Cool completely before cutting into bars.

This post is linked to Sweets for a Saturday.

Wednesday, April 27, 2011

Vanilla Bean Cupcakes

I made these cupcakes for a spring potluck last week and they were pretty tasty.  I really wanted to make these so I could use my new vanilla bean paste and see those wonderful vanilla bean specks in the cake and frosting.  The vanilla bean paste is a really cool product.  I got mine from a local specialty grocery, but you can also order it online.  You can use vanilla bean paste in place of vanilla beans and it is much less expensive but still packs a lot of good vanilla flavor.  I definitely recommend giving these a try.
VANILLA BEAN CUPCAKES
From Cookie Madness

INGREDIENTS - CUPCAKE
6 large egg whites (3/4 cup), at room temperature
1 cup whole milk, at room temperature
1 teaspoon almond extract
1 teaspoon vanilla paste
2 1/4 cups cake flour (9 ounces)
1 3/4 cups granulated sugar (12 1/4 ounces)
4 teaspoons baking powder
1 teaspoon table salt
12 tablespoons unsalted butter (1 1/2 sticks), softened but still cool and cut into pieces

INGREDIENTS - FROSTING
2 sticks (8 oz) butter, softened
4 cups powdered sugar
4 teaspoons vanilla bean paste
2 tablespoons milk

DIRECTIONS
1. Preheat oven to 350 degrees. Line 24 cupcake pans with paper liners.

2. Combine egg whites, milk, almond extract and vanilla paste in a large glass liquid measuring cup. Mix with a fork until blended.

3. Mix cake flour, sugar, baking powder, and salt in bowl of electric mixer at slow speed. Add butter and beat on low speed until mixture resembles moist crumbs, with no powdery streaks remaining.
Add all but 1/2 cup of milk mixture and beat at medium speed for 1 1/2 minutes. Add remaining 1/2 cup of milk mixture and beat 30 seconds more. Stop mixer and scrape sides of bowl. Return mixer to medium (or high) speed and beat 30 seconds longer.

4. Divide batter evenly between cupcake cups. Bake on center rack for 18-20 minutes or until cupcakes test done – a toothpick should come out with moist crumbs.  Let cupcakes rest in the pan for about 5 minutes, then carefully remove them from the pans and let them cool on a rack.

5. To make icing, mix together the butter and powdered sugar. Mix in the vanilla bean paste and some of the milk. Beat on high until light and creamy, scraping sides of bowl. Add remaining milk if needed. Taste test and add more sugar, vanilla bean paste or milk to get the consistency you want.

Friday, April 22, 2011

Classic Cheesecake

This cheesecake was made on request for a very special birthday.  Until this past week, it had probably been over a year since I baked a cheesecake, so I was slightly nervous that there would be issues.  Luckily, everything went smoothly.  The cheesecake turned out great - it was rich without being too heavy, and had a nice creamy consistency.  The recipe is simple and can be dressed up in a variety of ways.  I simply cut up a pint of strawberries, sprinkled them with sugar, let the berries sit overnight, and served the sweetened strawberries on the side.
I don't know why the top of the cheesecake is kind of spotted.  I suspect it had something to do with my not-so-stellar apartment oven.  Thankfully, the texture of the cheesecake was unaffected.
I will definitely not wait another six months before making cheesecake again!
CLASSIC CHEESECAKE
From Hannah's Kitchen

INGREDIENTS - CRUST
2 cups graham cracker crumbs
1/4 cup sugar
1/3 cup unsalted butter, melted

INGREDIENTS - FILLING
4 (8 ounce) packages cream cheese, softened
1 1/4 cups granulated sugar
1/2 cup sour cream
2 teaspoons vanilla extract
1 tablespoons fresh lemon juice
5 eggs

DIRECTIONS
1. Preheat oven to 475 degrees F.

2. Prepare a water bath by placing a large pan filled with about 1/2 inch of water into the oven while it preheats.

3. In a medium bowl, combine the graham cracker crumbs, sugar, and melted butter. Press the crumb mixture into and up the sides of a 9-inch spring form pan that has been sprayed with non-stick spray.

4. Wrap a large piece of heavy duty foil around the bottom of the pan to keep the cheesecake in the water bath.

5. In the large bowl of an electric mixer beat the cream cheese, sugar, sour cream, vanilla, and lemon juice. Mix for a couple of minutes or until the ingredients are smooth and creamy. Whisk the eggs in a medium bowl and then add them to the cream cheese mixture. Blend the mixture just enough to incorporate the eggs.

6. Pour the cream cheese filling into the crust.

7. Carefully place the cheesecake into the water bath in the oven. Bake for 12 minutes at 475 degrees, then turn the oven down to 350 degrees and bake for 50-60 minutes or until the top of the cheesecake turns a light brown or tan color.

8. Remove the cheesecake from the oven to cool.

9. When cheesecake cools to room temperature, cover with foil and chill for 6-8 hours before removing the outer ring of the pan and serving.

This post is linked to Sweets for a Saturday.

Sunday, April 10, 2011

Bacon Chocolate Chip Cookies

Using bacon in sweet applications seems to be all the rage, so of course I had to try it.   I candied the bacon in these cookies before chopping it up and adding it to the batter.  When I showed up at work and told people that there was bacon in the chocolate chip cookies I was met with skepticism.  However, everyone who tried the cookies thought they were good and the cookies soon vanished.  The candied bacon provides a sweet, salty, and smoky burst that really compliments the dark chocolate chips.  This cookie makes me think of my maternal grandmother, who never met a piece of bacon she didn't like, and who also happens to be one of the best bakers around.
The bacon goes into the oven sprinkled with brown sugar.
After baking, the bacon is dark and sweet.
The bacon is diced and mixed into the dough.
The end result is an interesting and delicious cookie!
BACON CHOCOLATE CHIP COOKIES
From Hannah's Kitchen

INGREDIENTS - CANDIED BACON
12 slices thick-cut bacon
1/4 cup brown sugar

INGREDIENTS - COOKIES
1/2 cup butter, softened
1/2 cup shortening
3/4 cup brown sugar
3/4 cup white sugar
2 eggs
1 teaspoon vanilla extract
2 1/2 cups all-purpose flour
1/2 teaspoon salt
1 teaspoon baking soda
12 slices candied bacon, diced
2 cups semi-sweet chocolate chips

DIRECTIONS:
1. For the bacon: preheat the oven to 400 degrees.  Place bacon on a rimmed baking sheet lined with parchment paper.  Sprinkle bacon with half of the brown sugar.  Bake for about 15 minutes total.  Halfway through the baking time, flip the slices of bacon over, drag them through the syrupy liquid in the pan, and sprinkle the slices with the remaining brown sugar.  Continue baking until bacon reaches a dark mahogany color.  Remove to a wire rack to cool.  Once bacon is cool and crisp, dice into small bits.

2. For the cookies: preheat oven to 350 degrees F.  Cream butter, shortening, and sugars together until light and fluffy.  Mix in vanilla and eggs until combined.  In a separate bowl, combine flour, salt, and baking soda.  Add flour mixture to butter mixture until combined.  Stir in chocolate chips and bacon pieces.  Drop dough by tablespoonfuls onto parchment-lined baking sheets.  Bake for 8-10 minutes or until edges are set and just turning light brown.  Cool on cookie sheets for a few minutes before removing to wire racks to cool completely.

This post is linked to Sweets for a Saturday and Sweet Tooth Friday.