Thursday, December 27, 2012

Buche de Noel

I had never made a Buche de Noel, nor eaten one, before this little adventure.  Several factors went into my need to make this delicious dessert, and I am going to share them with you.  First, I have a jelly roll cake pan, yet I had never made a rolled cake.  I really wanted to give it a try.  Second, a local gourmet grocery store was advertising and selling a Buche de Noel for $22.99 (on sale).  Surely I could make one that was just as tasty for less than that.  And finally, I was bringing dessert for our family Christmas dinner and I wanted something that was both festive and a show stopper.  This cake turned out to be fantastic and both kids and adults enjoyed it.  I don't know if there is a traditional flavor combination, but I went with a chocolate cake with chocolate mousse and chocolate frosting.  It was a labor-intensive process, but it was definitely worth the effort.
The long process started by separating the eggs.
Whip the egg whites and add sugar.
Beat until stiff peaks form.
Set aside and whip the egg yolks, vanilla, and additional sugar.
Stir together the dry ingredients.
Add to the yolk mixture with the water.
Add the chocolate mixture to the egg whites.
Fold until completely incorporated.
Pour batter into prepared pan and bake.
Make sure your towel is ready.
Turn the warm cake out onto the towel.
Roll it up.
When the cake is completely cool, unroll it.
Spread with mousse, roll it back up, and refrigerate.
After a few hours in the refrigerator, cut off a small piece on the diagonal to make a branch.
Frost the cake.
Use a fork to make a pretty tree bark-like pattern.
Decorate the cake as desired.
Admire the beauty.
Enjoy!
BUCHE DE NOEL
Adapted from Hershey's Kitchens

INGREDIENTS - MOUSSE
1/4 cup sugar
1 teaspoon unflavored gelatin
1/2 cup milk
1 cup semi-sweet chocolate chips
1 teaspoon vanilla extract
1 cup cold heavy whipping cream

INGREDIENTS - CAKE
1/4 cup powdered sugar
4  eggs, separated
1/2 cup plus 1/3 cup granulated sugar , divided
1 teaspoon vanilla extract
1/2 cup all-purpose flour
1/3 cup unsweetened cocoa powder
1/2 teaspoon baking powder
1/4 teaspoon baking soda
1/8 teaspoon salt
1/3 cup water
Additional powdered sugar

INGREDIENTS - FROSTING
3 1/2 cups powdered sugar
1/2 cup unsweetened cocoa powder
1/2 cup (1 stick) butter, softened
2 tablespoons light corn syrup
2 teaspoons vanilla extract
1/3 cup milk

DIRECTIONS
1.  For the mousse - Stir together sugar and gelatin in small saucepan; stir in milk. Let stand 2 minutes to soften gelatin. Cook over medium heat, stirring constantly, until mixture just begins to boil. Remove from heat. Immediately add chocolate chips; stir until melted. Stir in vanilla; cool to room temperature. Beat whipping cream in small bowl until stiff. Gradually add chocolate mixture, folding gently just until blended. Cover; refrigerate for 6-8 hours or overnight.

2. For the cake - Heat oven to 375°F. Line 15-1/2x10-1/2x1-inch jelly-roll pan with foil; generously grease foil. (I used Reynolds pan-lining paper). Sprinkle linen or thin cotton towel with 1/4 cup powdered sugar.

3. Beat egg whites in large bowl until soft peaks form; gradually add 1/2 cup granulated sugar, beating until stiff peaks form. Beat egg yolks and vanilla in medium bowl on medium speed of mixer 3 minutes. Gradually add remaining 1/3 cup granulated sugar; continue beating 2 additional minutes.

4. Stir together flour, cocoa, baking powder, baking soda and salt; add to egg yolk mixture alternately with water, beating on low speed just until batter is smooth. Gradually fold chocolate mixture into beaten egg whites until well blended. Spread batter evenly in prepared pan.

5. Bake 12 to 15 minutes or until top springs back when touched lightly in center. Immediately loosen cake from edges of pan; invert onto prepared towel. Carefully peel off foil. Immediately roll cake and towel together starting from narrow end; place on wire rack to cool completely.

6. Carefully unroll cake; remove towel. Gently stir filling until of spreading consistency. Spread cake with filling; reroll cake. Refrigerate several hours.

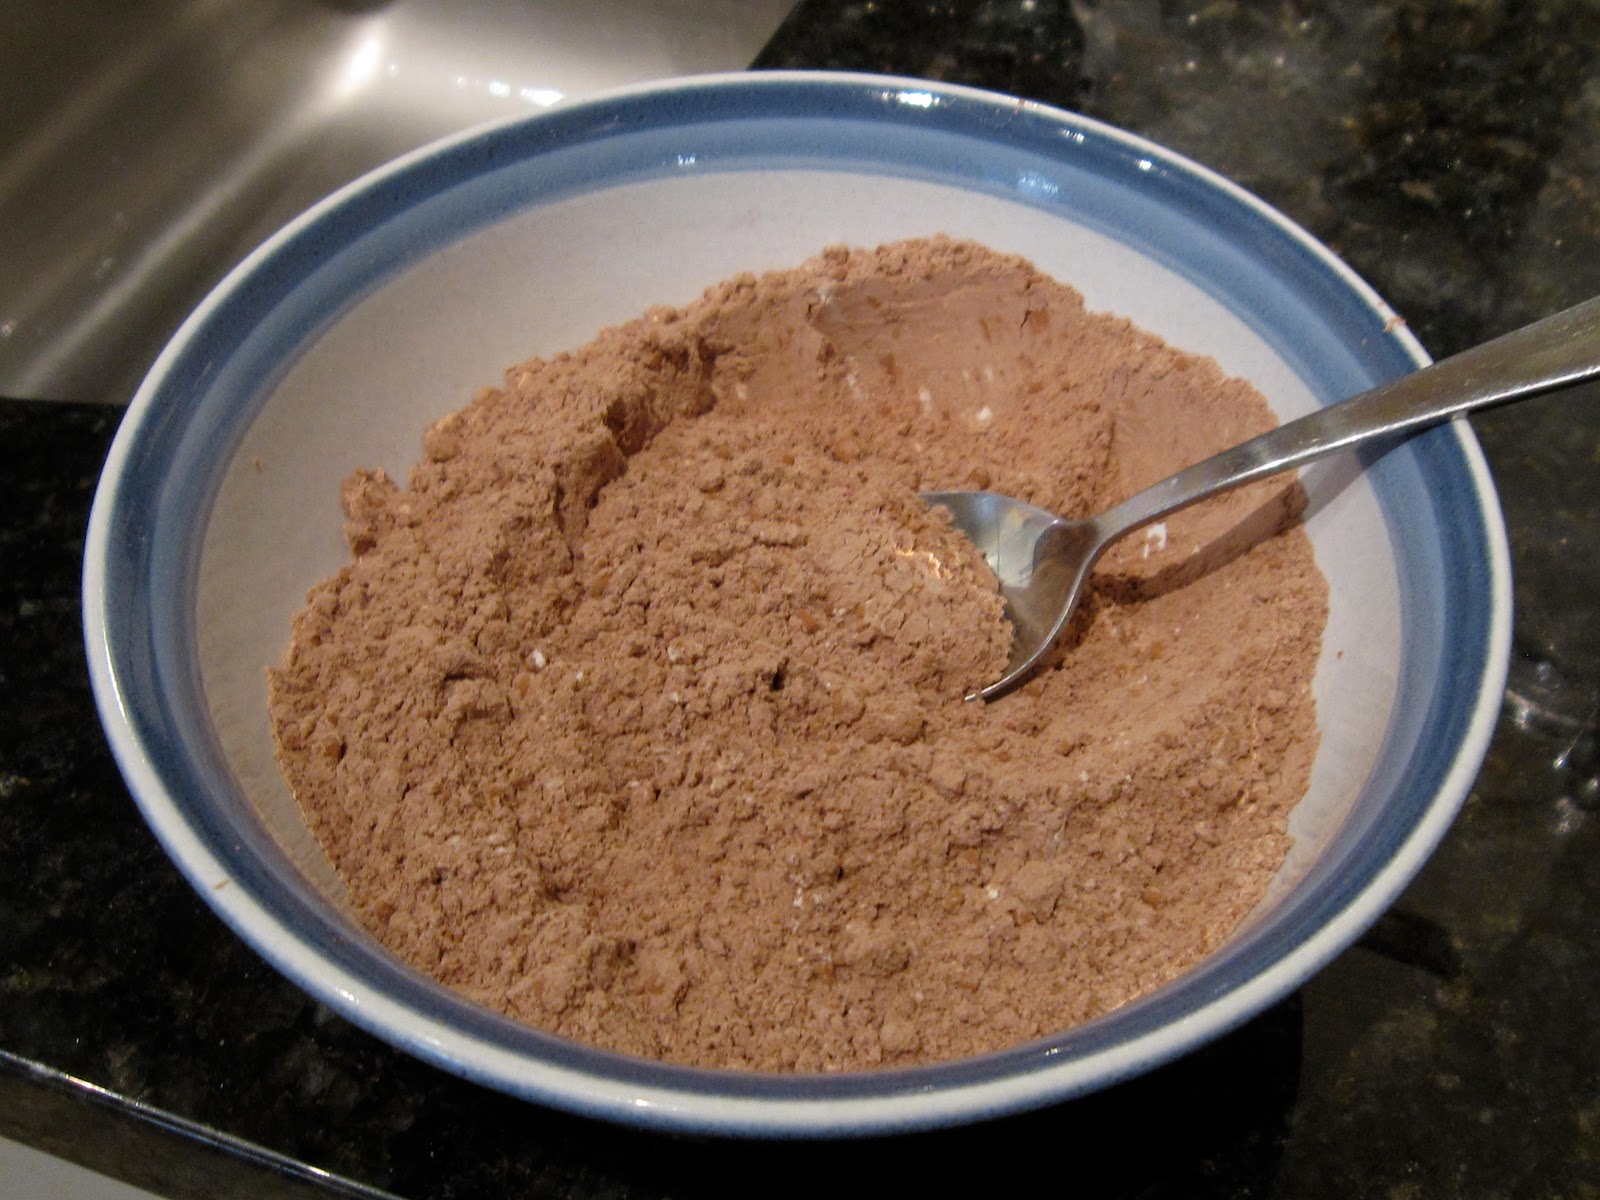
7. For the frosting - Combine powdered sugar and cocoa. Beat butter, 1/2 cup cocoa mixture, corn syrup and vanilla in medium bowl until smooth. Add remaining cocoa mixture alternately with milk, beating until smooth and of spreading consistency.

8. Remove cake from refrigerator and cut a small piece of the roll on the diagonal to use as a branch. Place the small piece of cake about 1/3 of the way down the cake roll and use frosting to help it stick to the cake. Cover the entire cake roll and ends with frosting. Use a fork to make decorative lines in the cake to mimic the pattern of a log. Decorate as desired.

This post is linked to Sweets for a Saturday.

Monday, November 12, 2012

Nutella Buttercream Frosting

I have a Nutella problem.  Once I open a jar I simply cannot stop eating it.  My preferred method of consumption is by the spoonful.  Eventually I realize I have eaten too much of the chocolatey hazelnut goodness, but then it seems like I have to even out what is left in the jar.  Before you know it, the jar is gone and my jeans are tight!

While Nutella by the spoonful is delightful, I figured I might as well try to find some other uses as well.  I've always wanted to try a Nutella buttercream, but I was worried I might be wasting precious Nutella if the frosting was a bust.  Fortunately, this recipe was delicious!  This will make enough frosting to pipe onto a dozen cupcakes, but would probably frost close to two dozen if you were just spreading it on.  I put the frosting on a basic chocolate cupcake.  If you want to kick things up a notch, fill the cupcake with a little bit of pure Nutella before frosting.  Enjoy!
NUTELLA BUTTERCREAM FROSTING
From Hannah's Kitchen

INGREDIENTS
1/2 cup butter, softened
1 cup Nutella
Pinch of salt
2 cups powdered sugar
4 to 6 tablespoons heavy cream

DIRECTIONS
1. Beat butter, Nutella and salt in the bowl of a stand mixer until combined.

2. Gradually add in powdered sugar and enough heavy cream to reach desired consistency.

3. When the sugar and cream have been incorporated, beat the frosting on medium-high speed until fluffy, about 2 minutes.

Thursday, October 18, 2012

Lemon Crinkle Cookies

I have been searching for a lemon cookie recipe that doesn't start with a boxed cake mix, and it has been a surprisingly difficult search.  Don't get me wrong, there is a time and a place to use a boxed cake mix.  However, for these cookies I was just dead set on that flavor that only a fresh lemon can provide.  After scouring the internet, Pinterest led me to this little gem of a recipe.  The first time I made them I was a little heavy handed with the powdered sugar and I was not happy with the final appearance of the baked cookies.  This time I made sure that the powdered sugar was thin, shaking off any excess before placing the dough balls on the cookie sheet.  These cookies were a hit with both my husband and my co-workers.  I highly recommend this recipe if you are looking for a fresh, soft, and chewy lemon cookie.

LEMON CRINKLE COOKIES
Adapted slightly from Lauren's Latest

INGREDIENTS
1/2 cup unsalted butter, softened
1 cup granulated sugar
1/2 teaspoon vanilla extract
1 egg
2 teaspoons lemon zest
1 tablespoon fresh lemon juice
1/4 teaspoon salt
1/4 teaspoon baking powder
1/8 teaspoon baking soda
1 1/2 cup all-purpose flour
1/2 cup powdered sugar

DIRECTIONS
1. Preheat oven to 350 degrees. Grease light colored baking sheets with non stick cooking spray or line baking sheets with parchment paper.

2. In a large bowl, cream butter and sugar together until light and fluffy. Whip in vanilla, egg, lemon zest, and juice until fully incorporated into the batter. Gently mix in all dry ingredients until just combined, excluding the powdered sugar. The dough will be fairly sticky. Pour powdered sugar onto a large plate. Roll a heaping teaspoon of dough into a ball and roll in powdered sugar. Shake off any excess powdered sugar. Place on baking sheet and repeat with remaining dough.

3. Bake for 9-11 minutes or until bottoms begin to barely brown and cookies look matte (not melty or shiny). Remove from oven and cool cookies about 3 minutes before transferring to cooling rack.

Saturday, October 13, 2012

Peanut Butter Chocolate Chip Cupcakes

You really can't go wrong with peanut butter and chocolate.  It is a time-tested, well-loved flavor combination.  I happen to be a huge fan of the dynamic duo, and I am always looking for recipes that showcase these flavors.  These cupcakes are fairly dense, moist, and the flavor resembles a peanut butter chocolate chip cookie.  I really like these.  A lot.  If you store these cupcakes in the refrigerator make sure to set them out at room temperature 30 minutes before eating so the chocolate chips can warm up.

PEANUT BUTTER CHOCOLATE CHIP CUPCAKES
Adapted from Recipe Snobs

INGREDIENTS - CUPCAKES
1 cup unbleached all purpose flour
1 teaspoon baking powder
1/4 teaspoon salt
6 tablespoons unsalted butter, at room temperature
3/4 cup creamy peanut butter
1/2 cup packed brown sugar
1/2 cup sugar
2 large eggs
1 teaspoon vanilla extract
1/2 cup milk
2 cups semi-sweet chocolate chips

INGREDIENTS - FROSTING
1 cup peanut butter
6 tablespoons unsalted butter, softened
1/2 teaspoon vanilla extract
1/4 teaspoon salt
2 cups powdered sugar
1/3 cup heavy cream

DIRECTIONS
1. For the cupcakes - Preheat oven to 350 degrees F. Line a 12-cup muffin tin with baking cups.

2. Combine the milk and vanilla in small bowl. Combine the flour, baking powder, and salt in bowl. Beat the butter and sugars in a mixer bowl until light and fluffy. Add eggs and blend until smooth. Slowly mix in peanut butter. Add half the flour mixture and blend slowly. When fully incorporated, add milk mixture. Continue to blend slowly. Add remaining flour mixture and mix on low speed just until incorporated. Add chocolate chips and fold in by hand.

3. Scoop the batter into lined baking cups and bake for about 22 minutes, or until tops spring back when lightly touched and the edges are golden brown.  Cool in the pan for 10 minutes, then remove cupcakes to a rack to cool completely.

4. For the frosting - Beat peanut butter, butter, vanilla, and salt in the bowl of a stand mixer until combined. Gradually add in powdered sugar and heavy cream.  When the sugar and cream have been incorporated, beat the frosting on medium-high speed until fluffy, about 2 minutes.

5. Pipe or spread frosting onto fully cooled cupcakes.  Decorate with chocolate chips, sprinkles, or a chocolate drizzle, if desired.

This post is linked to Sweets for a Saturday.

Tuesday, September 18, 2012

Sugar Cookie Bars

Traditional roll-out sugar cookies take a lot of work.  There is the mixing and the chilling and the rolling and the cutting.  I'm tired just thinking about it!  Whoever decided to put sugar cookies in a pan was onto something.  This recipe is super easy and provides that delicious frosted sugar cookie taste without all the added work.  Plus, the bars are easy to dress up with different colors of frosting and sprinkles.
SUGAR COOKIE BARS
Adapted slightly from High Heels & Grills

INGREDIENTS - COOKIES
2 1/2 cups all-purpose flour
1/2 teaspoon baking powder
1/2 teaspoon salt
1/2 cup butter, softened
1 cup granulated sugar
1 egg
1 1/2 tablespoon sour cream
1 teaspoon vanilla extract

INGREDIENTS - FROSTING
1/2 cup butter, softened
4 cups powdered sugar
2 to 4 tablespoons milk
1 teaspoon vanilla
Pinch of salt
Several drops of food coloring (optional)

DIRECTIONS
1. For the Cookies - Preheat oven to 375 degrees and grease a 9x13 inch baking dish.

2. In a medium bowl, combine flour, baking powder, and salt. Set aside.

3. In a large bowl, cream together butter and sugar until light and fluffy, about 3 minutes. Add egg and combine well. Add sour cream and vanilla and mix until completely blended. Slowly add the flour mixture and stir until well combined. 

4. Gently press the batter into the greased baking dish and spread out with hands. (If you butter your hands, this will help with the stickiness).

5. Bake for 17-20 minutes or until edges become lightly golden. Set aside to cool completely.

6. For the Frosting - In a medium bowl, cream together butter and powdered sugar. Add milk to achieve desired consistency and beat until light and fluffy. Beat in vanilla and salt. Add food coloring until desired color. Evenly frost the cooled bars. Cut into squares and serve.

Wednesday, August 8, 2012

Chocolate Oreo Cream Cake

I made this cake for my birthday in early July.  People always react with surprise when they learn that I am baking my own birthday cake, but I actually enjoy making my own cake because I know it will be delicious and I know I will get exactly what I want.  I've seen slight variations on this cake all over the internet, and while I only shared this cake with my husband, I can guess that it would be a crowd pleaser as well.

CHOCOLATE OREO CREAM CAKE

INGREDIENTS - CAKE
2 cups sugar
1 3/4 cups all-purpose flour
3/4 cup cocoa powder
1 1/2 teaspoons baking powder
1 1/2 teaspoons baking soda
1 teaspoon salt
2 eggs
1 cup milk
1/2 cup vegetable oil
2 teaspoons vanilla extract
1 cup boiling water

INGREDIENTS - FILLING
8 ounces cream cheese, softened
1/2 cup sugar
2 cups Cool Whip
12 Oreo cookies, coarsely crushed

INGREDIENTS - FROSTING
1 cup butter, softened
4 1/2 cups confectioners' sugar
1 cup Hershey's Special Dark baking cocoa
1/2 teaspoon vanilla extract
1/2 cup milk

DIRECTIONS
1. For the cake - preheat oven to 350 degrees. Line three 9-inch pans with parchment paper and spray pans with cooking spray. Stir together the sugar, flour, cocoa, baking powder, baking soda, and salt in a large bowl. Add eggs, milk, oil, and vanilla, and beat on medium speed of mixer for 2 minutes. Stir in boiling water (batter will be thin). Pour batter into prepared pans. Bake 22-25 minutes or until wooden pick inserted in center comes out clean. Cool 10 minutes; remove cakes from pans to wire racks. Cool cakes completely.

2. For the filling - beat the cream cheese and sugar together until well blended.  Fold in the Cool Whip until almost blended, then fold in the crushed Oreos.

3. For the frosting - in a large mixing bowl, cream butter. Gradually beat in confectioners' sugar, cocoa, and vanilla. Add enough milk until frosting reaches spreading consistency.


4. To assemble, place one cake round on a cake board or serving platter. Spread filling evenly over the cake, then top with the remaining cake layer. Cover the top and sides of the cake with the chocolate frosting. Store cake in the refrigerator.

Saturday, August 4, 2012

Gluten-Free Fudge Brownies

One of my friends was recently diagnosed with a gluten allergy, but I didn't want to let that keep me from bringing a home-baked treat when I visited.  This is an easy gluten-free recipe, as it does not call for any special flours or techniques.  Plus, the recipe yielded a rich, decadent brownie that any brownie lover would enjoy.  I really liked these brownies, and you would not suspect that they are gluten free when you taste them.  They are thick, fudgy, and the texture is fantastic.


GLUTEN-FREE FUDGE BROWNIES
Adapted slightly from David Lebovitz

INGREDIENTS
6 tablespoons (85g) butter, unsalted
1/8 teaspoon salt
8 ounces (225g) bittersweet or semisweet chocolate, chopped
3/4 cup (150g) sugar
2 large eggs, at room temperature
1 tablespoon unsweetened cocoa powder

3 tablespoons (30g) corn starch
1 cup (135g) pecans, toasted and coarsely chopped
(optional)

DIRECTIONS
1. Line the inside of an 8-inch square pan with foil so that it goes up the sides to the rim. Lightly grease the foil with butter or non-stick cooking spray. Preheat the oven to 350.

2. Melt the butter, salt, and chocolate in a medium saucepan over very low heat on the stove top, stirring constantly until smooth. Take caution not to burn the chocolate

3. Remove from heat and stir in the sugar, then the eggs, one at a time.

4. Sift together the cocoa powder and corn starch in a small bowl then stir them into the chocolate mixture. Beat the batter vigorously for at least one minute, until the batter is no longer grainy and nearly smooth. It will pull away from the sides of the pan a bit. This step is critical to ensure that you do not end up with crumbly brownies.

5. Add the nuts, if using, then scrape the batter into the prepared pan.

6. Bake for 30 minutes, or until the brownies feel just set in the center. Do not overbake. Remove from oven and let cool completely before removing from the pan and slicing.

This post is linked to Sweets for a Saturday.

Saturday, June 23, 2012

Pecan Chocolate Chip Blondies

I've been traveling a lot for work the past couple of months, which has led my poor baking supplies to be sadly neglected. Today seemed like the perfect day to get the oven going and churn out some baked goods (nevermind the fact that it was nearly 100 degrees outside). In the name of delicious baked goods, I will gladly crank up the oven on the hottest of days. I love a good blondie, and this is the perfect recipe to play around with by adding whatever mix-ins you desire.  This time I added pecans and chocolate chips, but you could add other nuts or chips or dried fruit.  You could even top these with frosting for a truly decadent treat.  This combination got the Husband Seal of Approval so I consider it a success!


PECAN CHOCOLATE CHIP BLONDIES
Adapted slightly from Smitten Kitchen

INGREDIENTS
8 ounces (1 stick) butter, melted
1 cup (7 3/4 ounces) brown sugar
1 large egg
1 teaspoon vanilla extract
1/4 teaspoon salt
1 cup (4 3/8 ounces) all-purpose flour
2/3 cup pecans, toasted and chopped
2/3 cup semi-sweet chocolate chips

DIRECTIONS
1. Coat an 8 x 8 pan with non-stick spray or line with parchment paper. Preheat oven to 350 degrees F.

2. Mix melted butter and brown sugar until smooth. Beat in egg, then add vanilla extract. Stir in salt and flour until just combined. Add pecans and chocolate chips and stir until just incorporated.

3. Pour batter into prepared pan. Bake 20-25 minutes or until set in the middle, taking caution not to overbake. Cool on a rack before cutting into bars.

This post is linked to Sweets for a Saturday.

Saturday, May 26, 2012

Lemon Cupcakes with Blackberry Buttercream

I've been on some kind of cupcake kick lately.  I blame all the cute pictures of cupcakes on the internet!  I just can't resist! This is another delicious cupcake recipe that is perfect for summertime.  The lemon and blackberry flavors are tart and refreshing.  If you don't have blackberry jam, you could probably try substituting raspberry or strawberry and still achieve excellent (and tasty) results. The original recipe says that it makes 24 cupcakes, but you will really only have enough batter for about 14-16 cupcakes.

LEMON CUPCAKES WITH BLACKBERRY BUTTERCREAM
Adapted slightly from allrecipes.com

INGREDIENTS - CAKE
1 cup white sugar
1/2 cup butter
2 eggs
1 1/2 teaspoons vanilla extract
1 1/2 cups all-purpose flour
1 3/4 teaspoons baking powder
1/2 cup low-fat milk
1 large lemon, juice and zest (or juice and zest of two small lemons)

INGREDIENTS - BUTTERCREAM
1 cup butter, softened
1 teaspoon vanilla extract
1/4 teaspoon salt
4 cups confectioners' sugar
1/2 cup seedless blackberry jam

DIRECTIONS 
1. Preheat oven to 350 degrees F (175 degrees C). Line muffin cups with paper liners. 

2. Cream sugar and 1/2 cup butter in the bowl of a stand mixer until fluffy. Beat in eggs, one at a time, and mix 1 1/2 teaspoons vanilla extract into mixture with the second egg. 

3. Beat in flour and baking powder until just combined; beat in milk, lemon juice, and lemon zest to make a smooth batter. Do not overmix. 

4. Spoon the batter into the prepared muffin cups (about 2/3 full). 

5. Bake in the preheated oven until cupcake edges are slightly golden brown and a toothpick inserted into the center of a cupcake comes out clean, 20 to 25 minutes. Cool cupcakes completely. 

6. For the buttercream, beat 1 cup butter with 1 teaspoon vanilla extract and salt until smooth and creamy. Beat in confectioners' sugar, 1 cup at a time, to make a creamy frosting. Beat in blackberry jam. Spread frosting on cooled cupcakes.

Saturday, May 19, 2012

Chocolate Cupcakes for Two

This is a perfect recipe for just two cupcakes!  The cake turns out fairly moist and the chocolate chips really add a good chocolate flavor punch.  This recipe is fantastic for those times when you just need a little something sweet but don't want to end up with a bunch of leftovers.  I've made these a couple of times and they are great!  You can eat one and freeze one for later, you can eat one and share one, or you can just eat them both!
CHOCOLATE CUPCAKES FOR TWO
Adapted from Brett Bara

INGREDIENTS - CAKE
3 tablespoons flour
2 tablespoons sugar
1 1/2 teaspoons unsweetened cocoa powder
1/8 teaspoon baking soda (just eyeball half of a quarter-teaspoon and it will be fine)
1/16 teaspoon salt (otherwise known as a pinch)
2 tablespoons cold water
1 tablespoon vegetable oil
1/16 teaspoon vanilla (just a few drops)
2 tablespoons chocolate chips

INGREDIENTS - FROSTING
2 tablespoons butter or margarine
2 tablespoons unsweetened cocoa powder
1/2 cup powdered sugar
1/2 to 1 teaspoon milk or water

DIRECTIONS
1. Preheat oven to 325 degrees. Line a cupcake pan with two cupcake liners.

2. For the cake, whisk all the dry ingredients together in a small bowl. In a second small bowl or spouted measuring cup, combine the wet ingredients. Add the wet to the dry and stir until combined, whisking well.

3. Divide batter between two cupcake liners and sprinkle with chocolate chips. Bake for 18 minutes or until a tester comes out clean. Allow to cool completely before frosting.

4. For the frosting, melt the butter or margarine in a small bowl. Whisk in the cocoa powder. Whisk in the powdered sugar and enough milk or water to achieve a smooth, spreadable consistency.  Top each cupcake with half of the frosting.

Sunday, April 29, 2012

Peanut Butter Torte

I've had my eye on this recipe for quite sometime.  Unfortunately, since my husband does not like peanut butter desserts, I just knew that if I made this torte I would end up eating way too much of it myself.  Luckily, I had a fun ladies-only potluck to attend so I decided to give this a try.  The peanut butter mousse was light and fluffy and oh so rich at the same time.  This is a decadent dessert and will make peanut butter fans swoon.

PEANUT BUTTER TORTE
Adapted slightly from Dorie Greenspan - Baking: From My Home to Yours

INGREDIENTS
1 1/4 cups finely chopped salted peanuts (for the filling, crunch and topping)
2 teaspoons sugar
1/2 teaspoon instant espresso powder (or finely ground instant coffee)
1/2 cup mini chocolate chips (or finely chopped semi sweet chocolate)
32 Oreo cookies, finely crumbed or ground in a food processor or blender
5 tablespoons unsalted butter, melted
Small pinch of salt
2 1/2 cups heavy cream
1 1/4 cups confectioners’ sugar, sifted
12 ounces cream cheese, at room temperature
1 1/2 cups salted peanut butter – crunchy or smooth (not natural)
2 tablespoons whole milk
4 ounces bittersweet chocolate finely chopped


DIRECTIONS
1. Getting Ready: Center a rack in the oven and preheat the oven to 350°F. Butter a 9-inch Springform pan and place it on a baking sheet lined with parchment or a silicone mat.

2. Toss 1/2 cup of the chopped peanuts, the sugar, espresso powder, and chocolate chops together in a small bowl. Set aside.

3. Put the Oreo crumbs, melted butter, and salt in another small bowl and stir with a fork just until crumbs are moistened. Press the crumbs evenly over the bottom and up the sides of the spring form pan (they should go up about 2 inches on the sides). Freeze the crust for 10 minutes.
Bake the crust for 10 minutes, then transfer it to a rack and let it cool completely before filling.

4. Working with a stand mixer fitted with the whisk attachment or with a hand mixer in a large bowl, whip 2 cups of the cream until it holds medium peaks. Beat in 1/4 cup of the confectioners’ sugar and whip until the cream holds medium-firm peaks. Scrape the cream into a bowl and refrigerate until needed.

5. Wipe out (do not wash) the bowl, fit the stand mixer with the paddle attachment if you have one, or continue with the hand mixer, and beat the cream cheese with the remaining 1 cup confectioners’ sugar on medium speed until the cream cheese is satiny smooth. Beat in the peanut butter, 1/4 cup of the chopped peanuts, and the milk.

6. Using a large rubber spatula, gently stir in about one quarter of the whipped cream, just to lighten the mousse. Still working with the spatula, stir in the crunchy peanut chocolate chip mixture, then gingerly fold in the remaining whipped cream.

7. Scrape the mousse into the crust, mounding, and smoothing the top. Refrigerate for at least 4 hours, or overnight; cover with plastic wrap as soon as the mousse firms.

8. To Finish the Torte: Put the chopped chocolate in a heatproof bowl and set the bowl over a saucepan of simmering water. Leave the bowl over the water just until the chocolate softens and starts to melt, about 3 minutes; remove the bowl from the saucepan. Bring the remaining 1/2 cup cream to a full boil. Pour the cream over the chocolate and, working with a a rubber spatula, very gently stir together until the ganache is completely blended and glossy. (My ganache was really runny so I let it sit for a while until it thickened). Pour the ganache over the torte, smoothing it with a metal icing spatula. Scatter the remaining 1/2 cup peanuts over the top and chill to set the topping, about 20 minutes.

9. When the ganache is firm, remove the sides of the Springform pan; it’s easiest to warm the pan with a hairdryer, and then remove the sides, but you can also wrap a kitchen towel damped with hot water around the pan and leave it there for 10 seconds. Refrigerate until ready to serve.

Sunday, April 1, 2012

Double Dark Chocolate Shortbread

I generally enjoy shortbread, but had never had chocolate shortbread before trying this recipe.  The cookie had a nice crumb and was not too sweet.  I used Ghiradelli bittersweet chocolate chips which provided a nice contrasting smooth and creamy texture.  The recipe only makes about 12 cookies, so double it up if you want more.  These would make any true chocolate lover happy.
DOUBLE DARK CHOCOLATE SHORTBREAD
Adapted slightly from Great Island

INGREDIENTS
1 stick (1/2 cup) unsalted butter, softened
1/4 cup confectioner's sugar
1 teaspoon vanilla
3/4 cup all-purpose flour
1/4 cup dark cocoa powder (I used Hershey's Special Dark cocoa powder)
Pinch of salt
1/2 cup dark chocolate chips

DIRECTIONS
1. Preheat oven to 325 degrees F. 

2. Put the flour, sugar, pinch of salt, and cocoa powder in the bowl of a food processor and pulse to combine well. 

3. Drop in the butter and vanilla and pulse until the mixture just comes together.  

4. Stir in the chocolate chips and turn the dough out onto a board and form into an 8" log.  

5. Wrap it in waxed or parchment paper and twist both ends to secure.  Refrigerate for at least an hour, or overnight.  You can also freeze the dough for later use. 

6. Slice the log into 1/2" slices with a sharp knife. 

7. Put on a parchment lined baking sheet and bake in the center of the oven at 325 for 12 to 15 minutes.  They will feel slightly soft, don't over bake them. 

8. Cool for a few minutes on the pan and then transfer to a rack.

Wednesday, March 7, 2012

Key Lime Cheesecake

My husband's birthday was this past week and I always offer to bake anything he requests for the big day.  We've had a variety of selections in the past, but this is the first year that he requested a cheesecake.  And not just any cheesecake - a key lime cheesecake.  I decided this could be challenging because it would be difficult to get a cheesecake with the level of tartness that one generally experiences in a key lime pie.  My big idea was to make the cheesecake with key lime juice and zest and then add a layer of key lime curd on top to give the cheesecake that tart punch.  Not to toot my own horn, but toot toot.  The cheesecake turned out fabulously.  The cheesecake was smooth and creamy, perfectly complemented by the tart layer of key lime curd. The photos definitely do not do this wonderful creation justice.  My husband declared this cheesecake the perfect key lime dessert!


My birthday man!
 
KEY LIME CHEESECAKE
Cheesecake from Hannah's Kitchen
Key lime curd adapted slightly from Martha Stewart

INGREDIENTS - KEY LIME CURD
1/2 cup sugar
2 eggs
2 teaspoons grated key lime zest
1/4 cup key lime juice (I use Nellie and Joe's bottled juice and it works great!)
4 tablespoons unsalted butter, cut into pieces

INGREDIENTS - CRUST
2 cups graham cracker crumbs
1/4 cup sugar
1/3 cup unsalted butter, melted

INGREDIENTS - FILLING
4 (8 ounce) packages cream cheese, softened
1 1/4 cups granulated sugar
1/2 cup sour cream, room temperature
1 teaspoon vanilla extract
5 eggs, room temperature
1/2 cup key lime juice
2 teaspoons key lime zest

DIRECTIONS
1. For the key lime curd - combine sugar, eggs, zest, and juice in a medium non-reactive saucepan set over medium-low heat. Cook, whisking constantly, until the mixture begins to thicken and holds the mark of the whisk, 10 to 12 minutes. Remove pan from heat and whisk in butter, one piece at a time, until well combined. Strain mixture through a sieve into a glass bowl. Lay plastic wrap directly on surface to prevent a skin from forming. Chill 3 hours or overnight to set the curd.

2. For the cheesecake - preheat oven to 475 degrees F.

3. Prepare a water bath by placing a large pan filled with about 1/2 inch of water into the oven while it preheats.

4. In a medium bowl, combine the graham cracker crumbs, sugar, and melted butter. Press the crumb mixture into and up the sides of a 9-inch spring form pan.

5. Wrap a large piece of heavy duty foil around the bottom of the pan to keep the cheesecake in the water bath.

6. In the large bowl of an electric mixer beat the cream cheese, sugar, sour cream, and vanilla. Mix for a couple of minutes or until the ingredients are smooth and creamy. Whisk the eggs in a medium bowl and then add them to the cream cheese mixture. Blend the mixture just enough to incorporate the eggs. Add the zest and lime juice and mix slowly until the juice is fully incorporated into the mixture.

7. Pour the cream cheese filling into the crust.

8. Carefully place the cheesecake into the water bath in the oven. Bake for 12 minutes at 475 degrees, then turn the oven down to 350 degrees and bake for 50-60 minutes or until the top of the cheesecake turns a light brown or tan color.

9. Remove the cheesecake from the oven and water bath to cool.

10. When cheesecake cools to room temperature, cover with foil and chill for 6-8 hours or overnight.

11. After the cheesecake has chilled, remove the outer ring of the pan. Cover the cheesecake with a thin layer of the curd. You may not need to use all of the curd to sufficiently cover the cheesecake.

12. Refrigerate until serving. Top with fresh whipped cream if desired.

This post is linked to Sweets for a Saturday.

Monday, February 20, 2012

Gooey Caramel Pecan Brownies

I love the Pioneer Woman.  I've been reading her cooking blog for years, and most recently I've been watching her show on the Food Network.  I saw her make these super simple brownies on an episode of her cooking show, and I knew I had to make them.  These have a ridiculously thick layer of caramel, which is why the brownies need to be completely cool before cutting.  I cracked open a 12 ounce can of evaporated milk to get the 1/3 cup and 1/2 cup needed for the recipe.  The remaining evaporated milk was the exact amount needed to make some simple fudge so I went ahead and whipped some of that up as well. Cut these brownies into small squares.  They are rich!
GOOEY CARAMEL PECAN BROWNIES
Adapted slightly from the Pioneer Woman

INGREDIENTS
1 stick unsalted butter, melted
1/3 plus 1/2 cup evaporated milk
1 box (18 1/2 ounces) German chocolate cake mix
1 cup finely chopped pecans
2 bags (11 ounces each) Kraft caramel bits
1/2 cup semisweet chocolate chips

DIRECTIONS
1. Preheat the oven to 350 degrees F. Spray a 9 x 9 inch baking pan with cooking spray.


2. Begin by pouring 1/3 cup evaporated milk into a bowl with the cake mix. Add the melted butter and the chopped pecans. Mix the ingredients together; it'll be pretty thick.


3. Divide the dough in half down the middle. Press half of it into the bottom of the prepared pan to make the first brownie layer. Bake until slightly set, 8 to 10 minutes. Then remove from the oven and set aside.


4. While the brownie layer is baking, in a double boiler (or glass bowl set over a bowl of simmering water) combine the caramels and the remaining 1/2 cup evaporated milk. Stir occasionally until the caramels are totally melted and the mixture is smooth. This step can also be done in the microwave. Pour the caramel mixture over the first baked layer, spreading so it's evenly distributed. Sprinkle the chocolate chips all over the top.


5. Next, on a clean surface or a sheet of waxed paper, press the remaining dough into a square shape slightly smaller than the baking pan. Carefully set it on top of the chocolate chips. Bake for 20 to 25 minutes. Remove the pan from the oven and let the brownies cool to room temperature. Cover the pan and refrigerate the brownies for several hours to allow them to set

This post is linked to Sweets for a Saturday.

Wednesday, February 8, 2012

Almond White Chocolate Chip Cookies

Work kept me away from my kitchen for nearly two weeks, so upon my return this past weekend I just had to bake something immediately.  My husband and I took an inventory of possible cookie ingredients that we had in the house, and we decided that the combination of almonds and white chocolate chips would be tasty.  These cookies turned out to be really good.  The edges bake up slightly crisp while the center stays nice and chewy.  These were a definite winner at our house!
ALMOND WHITE CHOCOLATE CHIP COOKIES
From Hannah's Kitchen

INGREDIENTS
1 cup unsalted butter, softened
3/4 cup brown sugar
3/4 cup white sugar
2 eggs
1 teaspoon almond extract
2 1/2 cups all-purpose flour
1 teaspoon salt
1 teaspoon baking soda
1 bag (11 ounces) white chocolate chips
1 cup sliced almonds

DIRECTIONS
1. Preheat oven to 375 degrees F. Line cookie sheets with parchment paper.

2. In a small bowl combine the flour, salt, and baking soda. Set aside.

3. In the large bowl of a stand mixer beat butter and sugars until light and fluffy. Add eggs and extract and beat until well mixed. Slowly add the flour and mix until just combined.

4. Stir in the white chocolate chips and almonds.

5. Use a tablespoon-size cookie scoop to drop the dough onto the prepared cookie sheets. Bake for 8-10 minutes or until edges are just starting to turn light brown. Cool on cookie sheet for 5 minutes before removing to wire racks to cool completely.

This post is linked to Sweets for a Saturday.

Tuesday, January 10, 2012

Joyful Almond, Coconut and Milk Chocolate Cookies

Today was just one of those days where I needed a homemade cookie. The flavors in this cookie are based on a popular candy bar containing many of the same ingredients. These little babies are packed full of sliced almonds, coconut flakes, and milk chocolate chips. The almond extract in the dough really adds to the flavor so I don't recommend substituting vanilla.
JOYFUL ALMOND, COCONUT AND MILK CHOCOLATE COOKIES
From Hannah's Kitchen

INGREDIENTS
1 cup shortening
3/4 cup brown sugar
3/4 cup white sugar
2 eggs
1 teaspoon almond extract
2 1/2 cups all-purpose flour
1 teaspoon salt
1 teaspoon baking soda
1 1/2 cups milk chocolate chips
2/3 cup sweetened flaked coconut
2/3 cup sliced almonds

DIRECTIONS
1. Preheat oven to 350 degrees F. Line cookie sheets with parchment paper.

2. In a small bowl combine the flour, salt, and baking soda. Set aside.

3. In the large bowl of a stand mixer beat shortening and sugars until light and fluffy. Add eggs and extract and beat until well mixed. Slowly add the flour and mix until just combined.

4. Stir in the chocolate chips, coconut, and almonds.

5. Use a tablespoon-size cookie scoop to drop the dough onto the prepared cookie sheets. Bake for 8-10 minutes or until edges are just starting to turn light brown. Cool on cookie sheet for 5 minutes before removing to wire racks to cool completely.

This post is linked to Sweets for a Saturday.

Sunday, January 8, 2012

Miniature Apple Pies

This is a classic American dessert downsized. I had seen pictures of miniature apple pies circulating on the internet and they looked too cute to resist. I used Pillsbury refrigerated pie crusts to speed the process, but you could definitely roll out a homemade crust as well.  I like my apple pie to be fairly tart, so you may have to add or adjust the amount of sugar used depending on your preferences and the tartness of your apples.  You may also want to experiment using different types of apples.  These pies would be awesome served with a scoop of vanilla ice cream on top!
Roll out the dough and cut it into 4 1/2 inch circles.
Press the dough into the muffin cups.
Peel, core, and chop the apples.
Cook the apples and the sugar, flour, and cinnamon until the apples are slightly softened and liquid is produced.
Fill the prepared crusts.
Bake and devour!
MINIATURE APPLE PIES
From Hannah's Kitchen

YIELD - 10 miniature pies

INGREDIENTS
1 package (2 rolls) Pillsbury refrigerated pie crust
4 large Granny Smith apples
7 tablespoons sugar
1 teaspoon cinnamon
3 tablespoons flour

DIRECTIONS
1. Preheat oven to 400 degrees F. On a lightly floured work surface, roll out pie dough just slightly to make it a bit thinner. Use a 4 1/2 inch round cookie or biscuit cutter to cut circles from the dough (I used a small pyrex dish as shown above). Gather scraps and re-roll dough until you have cut enough dough circles.

2. Press the dough evenly into the cavities of a regular size 12-cup muffin pan. Cut away any excess dough and shape the top of the crust as desired (I just used a pinching technique). Set prepared pan aside.

3. Peel, core, and chop the apples in to pieces no bigger than 1/2 an inch. In a 2-quart pot mix the apples, sugar, cinnamon, and flour and cook over medium heat until apples begin to soften and produce juice.

4. Fill the prepared mini pie crusts with the apple mixture. Top with decorative pieces of extra dough if desired.

5. Bake for 18-22 minutes or until crust is light golden brown. Cool at least 10 minutes before removing pies from the pan.

This post is linked to Sweets for a Saturday.